G-NK1NZZ9XJG

how to wash wool blanket

Wool Blanket Cleaning Guide

HOW TO WASH WOOL BLANKET:Wool blankets are a cozy and luxurious addition to any home, offering warmth and comfort during the colder months. However, they require special care to maintain their softness, durability, and appearance. In this comprehensive guide, we will walk you through the steps to wash your wool blankets properly, ensuring they remain in excellent condition for years to come.

Why Wool Blankets Need Special Care

Wool is a natural fiber known for its warmth, softness, and insulating properties. Unlike synthetic materials, wool can be delicate and prone to shrinking, felting, and losing its shape if not washed correctly. Understanding the right techniques and products to use is crucial to preserving the quality and longevity of your wool blanket.

Preparing Your Wool Blanket for Washing

1. Check the Care Label

Before you begin, always check the care label on your wool blanket. The label provides essential information about the manufacturer’s recommended cleaning methods, which can vary depending on the type of wool and the specific treatment the blanket has undergone.

2. Shake and Air Out

Give your blanket a good shake to remove loose dirt, dust, and debris. Air it out for a few hours, preferably outdoors in a shaded area, to freshen it up and release any trapped odors. This step can help reduce the frequency of washing, which can prolong the life of your blanket.

3. Spot Clean Stains

For minor stains or spots, use a gentle wool detergent or a mixture of water and vinegar. Dab the stained area with a clean cloth, avoiding rubbing, which can damage the fibers and cause pilling. Spot cleaning can be an effective way to address small issues without subjecting the entire blanket to a full wash.

How to Wash Wool Blankets by Hand

Hand washing is the safest method for cleaning wool blankets, as it allows for more control and gentleness. Follow these steps for a thorough yet gentle wash:

1. Fill a Tub with Cold Water

Fill a bathtub or a large basin with cold water. Avoid using hot water, as it can cause wool to shrink and lose its shape. Cold water helps maintain the integrity of the fibers.

2. Add Wool-Safe Detergent

Add a small amount of wool-safe detergent to the water. Wool detergents are specially formulated to clean without stripping the natural oils from the fibers. Avoid using regular laundry detergents, as they can be too harsh and cause damage.

3. Submerge the Blanket

Submerge your wool blanket in the water, gently pressing it down to ensure it’s fully saturated. Let it soak for about 15-20 minutes, allowing the detergent to work its way through the fibers and lift out dirt and oils.

4. Gently Agitate

Gently swish the blanket in the water to loosen dirt and debris. Be careful not to wring, twist, or rub the blanket, as this can cause stretching, felting, and damage to the fibers. Gentle agitation is key to preserving the blanket’s structure.

5. Rinse Thoroughly

Drain the soapy water and refill the tub with clean, cold water. Rinse the blanket by pressing it gently to remove any detergent. Repeat this process until the water runs clear, ensuring all soap residue is removed. Residual detergent can make the fibers feel stiff and uncomfortable.

6. Remove Excess Water

To remove excess water, lay the blanket on a clean, dry towel. Roll the towel and blanket together, pressing gently to absorb moisture. Avoid wringing or twisting the blanket, which can distort its shape and weaken the fibers.

7. Lay Flat to Dry

Lay the blanket flat on a dry surface, reshaping it to its original dimensions. Allow it to air dry naturally, avoiding direct sunlight and heat sources, which can cause shrinkage and damage. Ensure the blanket is completely dry before storing to prevent mold and mildew growth.

Washing Wool Blankets

How to Machine Wash Wool Blankets

If the care label indicates that machine washing is safe, follow these steps to minimize the risk of damage:

1. Use a Gentle Cycle

Set your washing machine to a gentle or wool cycle, using cold water. These settings reduce agitation and protect the delicate fibers of the wool blanket.

2. Add Wool Detergent

Use a wool-safe detergent, and avoid fabric softeners or bleach, which can damage wool fibers. Fabric softeners can coat the fibers and reduce their natural breathability, while bleach can weaken and discolor the wool.

3. Place the Blanket in a Mesh Bag

Place the blanket in a mesh laundry bag to protect it from excessive agitation and friction against the machine’s drum. This step helps prevent stretching and tangling.

4. Wash on a Short Cycle

Run the washing machine on a short cycle, just enough to clean the blanket without over-agitating it. Overwashing can cause wool to lose its softness and structural integrity.

5. Remove and Dry

After washing, follow the same drying steps as outlined in the hand washing section. Lay the blanket flat to dry, reshaping it as needed to maintain its original form.

Tips for Maintaining Wool Blankets

Regular Brushing

Brush your wool blanket with a soft-bristle brush to keep it fluffy and remove lint, dust, and hair. Regular brushing helps maintain the texture and appearance of the wool fibers.

Air Out Periodically

Air out your blanket every few months to keep it fresh and odor-free. This practice can help reduce the need for frequent washing and extend the life of your blanket.

Store Properly

Store your wool blanket in a cool, dry place. Use a breathable storage bag to protect it from dust, moths, and pests. Avoid plastic bags, as they can trap moisture and lead to mold growth.

Common Mistakes to Avoid

  • Using hot water or harsh detergents: Always use cold water and wool-safe detergents to prevent shrinking and damage.
  • Wringing or twisting the blanket: Handle your wool blanket gently to avoid distorting its shape and weakening the fibers.
  • Hanging the blanket to dry: Always lay your blanket flat to dry to maintain its shape and prevent stretching.

Table: Wool Blanket Care Summary

Care Step Description
Check Care Label Read the manufacturer’s instructions.
Shake and Air Out Remove loose dirt and odors.
Spot Clean Stains Use a gentle wool detergent or vinegar solution.
Hand Wash Soak in cold water with wool detergent. Gently agitate and rinse.
Machine Wash Use a gentle cycle with wool detergent. Place in a mesh bag.
Drying Lay flat to dry. Avoid hanging or using a dryer.
Regular Brushing Brush with a soft-bristle brush to maintain fluffiness.
Air Out Periodically Air out every few months to keep fresh.
Proper Storage Store in a cool, dry place in a breathable bag.

Frequently Asked Questions (FAQs)

Q1: Can I use regular laundry detergent to wash my wool blanket?

A1: No, regular laundry detergents can be too harsh for wool. They can strip the natural oils from the fibers, causing them to become dry and brittle. Always use a detergent specifically designed for wool to prevent damage and maintain the softness of your blanket.

Q2: How often should I wash my wool blanket?

A2: Wool blankets do not need frequent washing. Depending on usage, washing them once or twice a year is usually sufficient. Spot cleaning and airing out can help maintain freshness between washes. Over-washing can wear down the fibers and reduce the blanket’s lifespan.

Q3: Can I dry my wool blanket in the dryer?

A3: It’s best to avoid using a dryer for wool blankets. The heat can cause shrinkage and damage the fibers. Always air dry your wool blanket by laying it flat. If you must use a dryer, use a no-heat or air-only setting, and monitor the process closely.

Q4: What should I do if my wool blanket shrinks?

A4: If your wool blanket shrinks, try gently stretching it back to its original size while it’s still damp. Lay it flat to dry and reshape as needed. If the shrinkage is severe, you may need to consult a professional cleaner for assistance.

Q5: Is it safe to use fabric softener on wool blankets?

A5: Fabric softeners can coat wool fibers and reduce their natural breathability. This can make the blanket less effective at regulating temperature and moisture. It’s best to avoid using fabric softeners on wool blankets and instead rely on proper washing and drying techniques to maintain softness.

Q6: Can I use vinegar to wash my wool blanket?

A6: Yes, vinegar can be used as a natural fabric softener and stain remover. Dilute it with water and use it sparingly to avoid overpowering the wool fibers. Vinegar helps break down soap residue and can help remove mild odors.

Q7: How do I remove pet hair from my wool blanket?

A7: Use a lint roller or a soft-bristle brush to remove pet hair. Regularly brushing your blanket can help prevent hair buildup and keep it looking clean and tidy. For stubborn hair, you can also use a vacuum cleaner with a brush attachment on a low setting.

Conclusion

By following these guidelines, you can keep your wool blankets clean, cozy, and in excellent condition. For more cleaning tips and guides, visit Clean Sculpt. We’re here to help you maintain a pristine and comfortable home.

how to remove bad smell from clothes after washing

How to Remove Bad Smell from Clothes After Washing

How to Remove Bad Smell from Clothes After Washing: Dealing with bad smells on clothes after washing can be incredibly frustrating. You expect your laundry to come out fresh and clean, but instead, you’re met with unpleasant odors that seem to cling stubbornly to the fabric. Fortunately, there are several effective methods to ensure your clothes smell fresh and clean every time. In this comprehensive guide, we will explore practical tips on how to remove bad smell from clothes after washing. By following these steps, you can enjoy pleasantly scented garments every time.

Why Clothes Smell Bad After Washing

Sometimes, clothes develop a bad smell even after a thorough wash. This issue can arise due to various reasons:

  • Detergent Residue: Excess detergent can remain in the fabric, especially if you’re using too much or your washing machine isn’t rinsing thoroughly. This residue can trap odors within the fibers.
  • Mildew and Mold: If clothes are left damp for too long, either in the washer or when drying, they can develop mildew or mold. These fungi thrive in moist environments and can leave a musty smell on your clothes.
  • Dirty Washing Machine: A dirty washer can harbor bacteria, mold, and mildew, which can transfer to your clothes during the wash cycle.
  • Improper Drying: Inadequate drying can lead to musty smells. Clothes that are not dried thoroughly can remain damp, creating a breeding ground for mold and mildew.

Understanding these causes is the first step in addressing the problem effectively.

Effective Tips to Remove Bad Smell from Clothes

  1. Use White Vinegar

White vinegar is excellent for neutralizing odors. It acts as a natural deodorizer and can help remove detergent residue. Add one cup of white vinegar to the rinse cycle to eliminate any lingering smells. Vinegar also has antibacterial properties that can help kill odor-causing bacteria.

  1. Baking Soda Solution

Baking soda absorbs odors and can neutralize acidic and basic molecules in your clothes. Mix half a cup of baking soda with water and add it to your washing machine during the wash cycle. This method is particularly effective for removing strong, stubborn odors.

  1. Essential Oils

Adding a few drops of essential oils like lavender, eucalyptus, or tea tree oil to the wash can provide a fresh, pleasant scent. Essential oils also have antimicrobial properties that can help combat bacteria and mold. Add the oils to your wash cycle or mix them with your laundry detergent.

  1. Sun Drying

Drying your clothes under the sun is an excellent way to eliminate odors. The ultraviolet rays from the sun help kill bacteria and fungi that cause bad smells. Additionally, fresh air can help dissipate any lingering odors, leaving your clothes smelling fresh.

  1. Deep Cleaning the Washing Machine

Clean your washing machine regularly to prevent odor transfer. Run an empty cycle with hot water and two cups of white vinegar once a month. This helps remove any buildup of detergent, fabric softener, and mold that can cause odors. For a more thorough clean, wipe down the interior and the rubber gasket with a mixture of vinegar and water.

  1. Avoid Overloading the Washer

Do not overload your washing machine. Overloading prevents proper cleaning and rinsing of clothes, which can leave detergent residue and cause odors. Ensure there is enough space for your clothes to move freely during the wash cycle.

  1. Use Fresh Air

Hang your clothes in a well-ventilated area to dry. Fresh air helps to dissipate any residual smells and prevents mildew from developing. If possible, use a clothesline outside where your clothes can benefit from both fresh air and sunlight.

How to Remove Bad Smell from Clothes After Washing

Alternative Methods for Persistent Odors

  1. Lemon Juice

Lemon juice is a natural deodorizer with a fresh, citrus scent. Add half a cup of lemon juice to the rinse cycle for a fresh scent. Lemon juice’s acidic nature helps break down odor-causing molecules, leaving your clothes smelling clean.

  1. Borax

Borax is a powerful odor eliminator and laundry booster. Add half a cup of borax to your laundry detergent for extra cleaning power. Borax helps soften water, making detergents more effective and improving the removal of stains and odors.

  1. Enzyme Cleaners

Enzyme cleaners break down organic materials that cause odors, such as sweat, oils, and food residues. Use an enzyme cleaner as a pre-treatment before washing your clothes. Spray the enzyme cleaner on the affected areas and let it sit for 15-20 minutes before washing as usual.

  1. Activated Charcoal

Activated charcoal is highly effective at absorbing odors. Place activated charcoal in your closet or drawers to absorb any lingering smells. You can also use activated charcoal bags in your laundry room to keep the air fresh.

  1. Hydrogen Peroxide

Hydrogen peroxide can kill odor-causing bacteria and brighten whites. Add half a cup of hydrogen peroxide to your laundry to enhance the cleaning process. Be cautious with colored fabrics, as hydrogen peroxide can cause fading.

Table: Quick Reference for Odor Removal Methods

Method

Ingredients Needed

How to Use

White Vinegar

1 cup of white vinegar

Add to rinse cycle

Baking Soda

½ cup of baking soda

Mix with water and add to washer

Essential Oils

Few drops of essential oil

Add to wash cycle

Sun Drying

Sunlight

Dry clothes under the sun

Lemon Juice

½ cup of lemon juice

Add to rinse cycle

Borax

½ cup of borax

Add to laundry detergent

Enzyme Cleaners

Enzyme cleaner

Pre-treat before washing


Preventing Bad Smells in Clothes

Regular Machine Maintenance

Clean your washing machine regularly to prevent buildup and odors.

Proper Storage

Store clothes in a dry, well-ventilated area to avoid mildew and mold growth.

Use the Right Detergent

Choose a detergent designed to eliminate odors, not just mask them.

Prompt Drying

Dry clothes promptly after washing to prevent musty smells.

Conclusion

By following these tips, you can effectively remove bad smell from clothes after washing. Remember to regularly clean your washing machine and use natural deodorizers like vinegar and baking soda. Fresh, clean-smelling clothes are just a few steps away!

For more cleaning tips and guides, visit Clean Sculpt.

FAQs

  1. How can I prevent my clothes from smelling bad after washing?

To prevent bad smells, clean your washing machine regularly, avoid overloading it, and dry your clothes promptly after washing.

  1. What can I add to my wash to remove odors?

You can add white vinegar, baking soda, essential oils, or lemon juice to your wash to help remove odors.

  1. How often should I clean my washing machine?

Clean your washing machine at least once a month to prevent odor buildup and ensure it functions efficiently.

  1. Can sun drying help remove bad smells from clothes?

Yes, sun drying can help remove bad smells. The ultraviolet rays from the sun kill bacteria and freshen clothes.

  1. What should I do if my clothes still smell after washing?

If your clothes still smell after washing, try using stronger odor eliminators like enzyme cleaners, borax, or hydrogen peroxide.

  1. Why does my washing machine smell bad?

A washing machine can smell bad due to detergent residue, mold, and mildew. Regular cleaning and maintenance can prevent these issues.

  1. Can I use essential oils in my laundry?

Yes, adding a few drops of essential oils to your laundry can provide a pleasant scent and help mask any lingering odors.

How To Use Torch Tip Cleaner

torch tip cleaner use

Maintaining your torch tips is crucial for optimal performance and longevity. A torch tip cleaner is an essential tool for this task. This guide will provide you with everything you need to know about using a torch tip cleaner. From understanding the importance of cleaning torch tips to learning the best practices, we’ve got you covered. Regular cleaning of your torch tips ensures that your torch operates efficiently and safely. By removing debris and buildup, a torch tip cleaner helps maintain a steady and controlled flame, which is vital for precision work.

Why You Need a Torch Tip Cleaner

Using a torch tip cleaner is not just about extending the life of your torch but also about ensuring safety and efficiency. Torch tips can accumulate carbon deposits and other debris over time, which can clog the tip and disrupt the flame. This can lead to uneven heating, poor performance, and even dangerous flare-ups. Regular maintenance with a torch tip cleaner can prevent these issues, ensuring that your torch operates smoothly and safely. Additionally, a clean torch tip produces a more consistent flame, which is essential for tasks that require precision, such as welding or cutting.

Types of Torch Tip Cleaners

There are various types of torch tip cleaners available, each designed for different kinds of torches and cleaning needs. Wire tip cleaners are small, flexible wires that can be inserted into the torch tip to remove blockages. Brush cleaners are tiny brushes that can reach into the tip to remove soot and debris. Reamers are tools designed to scrape out the deposits inside the torch tip. Each type of cleaner has its own advantages and is best suited for specific cleaning tasks. For example, wire tip cleaners are ideal for precision cleaning, while brush cleaners are better for general cleaning purposes.

torch tip cleaner uses

Type of Cleaner

Description

Best For

Wire Tip Cleaner

Flexible wires for detailed cleaning

Precision work

Brush Cleaner

Tiny brushes for thorough cleaning

General use

Reamers

Scrapers for stubborn deposits

Heavy-duty cleaning

How to Use a Torch Tip Cleaner

Using a torch tip cleaner is straightforward. First, ensure the torch is completely off and cool before you start cleaning. Safety should always be your top priority. Select a cleaner that is suitable for your torch tip size. Gently insert the wire or brush into the torch tip, and use a back-and-forth motion to remove debris. It is important to be gentle to avoid damaging the tip. After cleaning, inspect the tip to ensure it’s clear of obstructions. If debris remains, repeat the cleaning process until the tip is completely clean.

Best Practices for Torch Tip Maintenance

To keep your torch tips in optimal condition, follow these best practices. Clean your torch tips regularly to prevent buildup. A good rule of thumb is to clean the tip after every few uses. Proper storage is also crucial. Store your torch and cleaners in a dry place to prevent rust and other damage. Before each use, always inspect the torch tip to ensure it’s clean and in good condition. Using high-quality fuel can also help minimize buildup, reducing the need for frequent cleaning.

Troubleshooting Common Issues

Sometimes, even with regular maintenance, issues can arise. A clogged tip is a common problem that can be resolved by using a reamer to scrape out the deposits. An uneven flame can be caused by partial clogs in the torch tip. Using a wire cleaner to ensure the tip is completely clear can help resolve this issue. A sputtering flame can result from moisture in the fuel. Ensure your fuel is dry and the tip is clean. If you encounter persistent problems, it may be time to inspect other components of the torch for issues.

FAQs

  1. What is a torch tip cleaner?

    A torch tip cleaner is a tool used to remove debris and buildup from the tip of a torch. It helps maintain the torch’s efficiency and safety. Regular use of a torch tip cleaner ensures that the flame remains steady and controlled, which is crucial for precision work.

  2. How often should I clean my torch tip?

    It’s recommended to clean your torch tip after every few uses. Regular cleaning prevents buildup and ensures optimal performance. By keeping the tip clean, you can extend the life of your torch and improve its efficiency.

  3. Can I use any cleaner for my torch tip?

    No, it’s important to use a cleaner that is designed for your specific torch tip. Using the wrong cleaner can damage the tip. Always refer to the manufacturer’s guidelines to select the appropriate cleaner for your torch.

  4. Why is my torch flame uneven?

    An uneven flame can be caused by partial clogs in the torch tip. Cleaning the tip thoroughly with a wire cleaner can help resolve this issue. Ensure that the cleaner you use is compatible with the size and type of your torch tip.

  5. How do I know if my torch tip is clean?

    After cleaning, inspect the tip visually. If the tip is free of debris and the flame is steady and controlled, it is clean. A properly cleaned tip will produce a consistent and reliable flame, which is essential for accurate work.

  6. What should I do if my torch is still not working after cleaning?

    If cleaning doesn’t resolve the issue, check the fuel quality and ensure there are no leaks in the torch. If problems persist, consider professional inspection. It may be necessary to replace certain components or consult with a specialist.

  7. Are there any safety tips for using a torch tip cleaner?

    Always ensure the torch is completely off and cool before cleaning. Use the cleaner gently to avoid damaging the tip. Store the torch and cleaner in a safe, dry place. Follow the manufacturer’s guidelines for additional safety tips and best practices.

Conclusion

Maintaining your torch tips with a torch tip cleaner is essential for safe and efficient operation. Regular cleaning, proper storage, and using the right cleaner can significantly extend the life of your torch. Visit Clean Sculpt for more cleaning tips and guides. Keep your tools in top shape and ensure your projects run smoothly.

How to Clean Canvas Bag

Clean a Canvas Bag

Cleaning a canvas bag can be straightforward when you know the right steps. Whether it’s a tote, backpack, or any other type, maintaining its appearance is essential. In this article, we’ll explore how to clean a canvas bag effectively using simple and practical methods. From removing stains to routine cleaning, this guide has you covered.

Why Clean Your Canvas Bag?

Keeping your canvas bag clean is crucial for longevity and hygiene. Over time, dirt, stains, and odors can accumulate, making your bag look worn out. Regular cleaning not only preserves its aesthetic appeal but also extends its life. Here’s how you can ensure your canvas bag remains in top condition.

Preparing Your Canvas Bag for Cleaning

Before you start cleaning, it’s important to prepare your canvas bag. Follow these steps for optimal results:

  1. Empty the Bag: Remove all items from your canvas bag. Shake it out to get rid of any loose dirt or debris.
  2. Check the Care Label: Always refer to the care label for specific cleaning instructions. This ensures you don’t damage the fabric.
  3. Spot Test: Perform a spot test with your cleaning solution on a small, inconspicuous area of the bag to ensure it doesn’t cause discoloration.

Materials Needed

  • Mild detergent
  • Soft brush or sponge
  • Clean white cloth
  • Warm water
  • Baking soda
  • White vinegar
  • Soft towel

Step-by-Step Guide on How to Clean a Canvas Bag

  1. Spot Cleaning Stains

For minor stains, spot cleaning is often sufficient. Here’s how you can do it:

  1. Mix a Cleaning Solution: Combine a small amount of mild detergent with warm water.
  2. Apply the Solution: Dip a soft brush or sponge into the solution and gently scrub the stained area.
  3. Blot Dry: Use a clean white cloth to blot the area dry.
  1. Deep Cleaning the Entire Bag

For a thorough clean, follow these steps:

  1. Prepare the Cleaning Solution: Mix mild detergent with warm water in a basin.
  2. Submerge the Bag: Place the canvas bag in the solution, ensuring it’s fully submerged.
  3. Scrub Gently: Use a soft brush to gently scrub the entire bag, focusing on any heavily soiled areas.
  4. Rinse Thoroughly: Rinse the bag with clean water to remove all soap residues.
  5. Dry Properly: Pat the bag with a towel to remove excess water and let it air dry.
  1. Removing Odors from Canvas Bags

Clean a Canvas Bag

To remove unpleasant odors, follow these steps:

  1. Use Baking Soda: Sprinkle baking soda inside the bag and let it sit overnight.
  2. Vacuum Out: The next day, vacuum out the baking soda.
  3. Apply Vinegar Solution: If the odor persists, mix equal parts white vinegar and water. Spray lightly inside the bag and let it air dry.

Table: Quick Cleaning Tips for Canvas Bags

Cleaning Step

Materials Needed

Instructions

Spot Cleaning

Mild detergent, sponge

Apply solution to stains and blot dry

Deep Cleaning

Mild detergent, brush

Submerge bag, scrub gently, rinse thoroughly, air dry

Odor Removal

Baking soda, vinegar

Sprinkle baking soda overnight, vacuum, spray vinegar solution

Tips for Maintaining Your Canvas Bag

  1. Regular Cleaning

Clean your canvas bag regularly to prevent dirt buildup. Regular spot cleaning can help maintain its appearance between deep cleans.

  1. Avoid Overloading

Do not overload your bag as it can cause strain and lead to wear and tear. Overloaded bags are more prone to fabric stress and damage.

  1. Store Properly

Store your canvas bag in a cool, dry place to prevent mold and mildew. Use dust bags or pillowcases to protect it from dust when not in use.

  1. Use a Liner

Consider using a bag liner to protect the interior from spills and stains. Liners can be easily removed and washed, keeping the bag’s interior clean.

  1. Protect from Sunlight

Extended exposure to sunlight can fade the colors of your canvas bag. Store it in a shaded area and avoid leaving it in direct sunlight for prolonged periods.

  1. Reinforce Weak Areas

If you notice any weak or frayed areas on your bag, reinforce them with fabric glue or by sewing patches. This will prevent small issues from becoming major problems.

FAQs

  1. Can I wash my canvas bag in a washing machine?

Yes, most canvas bags can be washed in a washing machine on a gentle cycle. However, always check the care label first. Use mild detergent and cold water to prevent shrinkage and maintain the fabric’s quality.

  1. How often should I clean my canvas bag?

It’s recommended to clean your canvas bag every few months, depending on usage. Regular spot cleaning can keep it looking fresh in between deep cleans. If you use the bag daily, consider cleaning it more frequently.

  1. What should I do if my canvas bag gets moldy?

If your canvas bag develops mold, mix equal parts water and white vinegar. Apply the solution to the moldy areas and scrub gently with a soft brush. Rinse thoroughly and let it air dry in direct sunlight, as UV rays can help kill mold spores.

  1. Can I use bleach on my canvas bag?

Using bleach on a canvas bag is not recommended, as it can weaken the fabric and cause discoloration. Stick to mild detergents and natural cleaning solutions like baking soda and vinegar for safe cleaning.

  1. How do I prevent my canvas bag from getting dirty?

To prevent dirt, avoid placing your canvas bag on the ground or in dirty areas. Store it in a clean, dry place when not in use, and consider using a protective spray designed for fabric bags to repel stains and moisture.

  1. Can I iron my canvas bag to remove wrinkles?

Yes, you can iron your canvas bag to remove wrinkles. Use a low heat setting and place a cloth between the iron and the bag to protect the fabric. Alternatively, steaming the bag can also help remove wrinkles without direct contact.

  1. Is it safe to use commercial stain removers on canvas bags?

Commercial stain removers can be used on canvas bags, but it’s important to test them on a small, hidden area first. Some products may be too harsh and could damage the fabric or cause discoloration. 

Conclusion

Cleaning your canvas bag doesn’t have to be a daunting task. By following the steps outlined in this guide, you can ensure your bag remains clean, fresh, and long-lasting. Remember to perform regular maintenance and spot cleaning to keep your canvas bag looking its best. For more comprehensive cleaning guides and tips, visit Clean Sculpt. We are dedicated to helping you maintain the cleanliness and appearance of your belongings with ease and expertise. Happy cleaning!

How to Use Suede Shoe Cleaner

Use Suede Shoe Cleaner

Guide to Use Suede Shoe Cleaner: Keeping your suede shoes looking pristine can be a challenge. Suede, with its soft, velvety texture, is a popular choice for stylish footwear but can be tricky to maintain. In this comprehensive guide, we’ll explore the best techniques and products for cleaning suede shoes, ensuring they stay looking new for longer.

Why You Need a Suede Shoe Cleaner

Suede is a delicate material that requires special care. Using the right suede shoe cleaner can make all the difference in maintaining the appearance and longevity of your shoes. Unlike regular leather, suede is prone to stains and discoloration, so it’s crucial to clean it properly.

Benefits of Using a Suede Shoe Cleaner

  • Protects the Material: A specialized cleaner preserves the integrity of the suede.
  • Removes Stains: Effectively lifts dirt and stains without damaging the fabric.
  • Enhances Longevity: Regular cleaning with the right products extends the life of your shoes.

How to Choose the Best Suede Shoe Cleaner

Selecting the best suede shoe cleaner is essential for effective maintenance. Here are some tips:

  • Check Ingredients: Look for cleaners specifically formulated for suede.
  • Read Reviews: Customer feedback can provide insights into a product’s effectiveness.
  • Consider Brand Reputation: Trusted brands often offer reliable products.

Top Suede Shoe Cleaner Products

Product Name

Key Features

Price Range

Jason Markk Suede Cleaner

Eco-friendly, gentle on suede, effective on stains

$15 – $20

Kiwi Suede Cleaner

Trusted brand, easy application, quick drying

$10 – $15

Angelus Suede Cleaner

Professional grade, deep cleaning, safe formula

$12 – $18

Step-by-Step Guide to Cleaning Suede Shoes

Preparation

Before you start cleaning, gather all necessary materials:

  • A suede shoe cleaner
  • Suede brush
  • Soft cloth
  • Suede protector spray
Cleaning Process
  1. Brush Off Dirt: Use a suede brush to remove loose dirt and debris. Always brush in one direction to avoid damaging the nap.
  2. Apply Cleaner: Spray or apply the suede shoe cleaner evenly. Avoid soaking the shoe.
  3. Gently Scrub: Use the suede brush to work the cleaner into the fabric, focusing on stained areas.
  4. Wipe with Cloth: Use a soft cloth to wipe away excess cleaner and dirt.
  5. Dry Naturally: Allow your shoes to air dry. Avoid direct sunlight or heat sources.
Finishing Touch

Once your shoes are dry, apply a suede protector spray to guard against future stains and damage. This final step helps maintain the fresh look of your suede shoes.

Use Suede Shoe Cleaner

Tips for Maintaining Suede Shoes

  • Regular Brushing: Keep your suede shoes in top condition by brushing them after each wear.
  • Use a Protector Spray: Regularly apply a suede protector to shield against stains.
  • Store Properly: Keep your shoes in a cool, dry place away from direct sunlight.

Common Mistakes to Avoid

  • Using Water: Water can stain and damage suede. Always use a dry cleaner.
  • Skipping Protector Spray: This leaves your shoes vulnerable to future stains.
  • Improper Storage: Storing shoes in damp conditions can lead to mold and damage.

FAQs

How often should I clean my suede shoes?

Clean your suede shoes every few weeks or whenever they appear dirty. Regular maintenance helps preserve their appearance.

Can I use a regular shoe cleaner on suede?

No, regular shoe cleaners can damage suede. Always use a cleaner specifically designed for suede.

How do I remove tough stains from suede shoes?

For tough stains, use a professional-grade suede cleaner and a brush. If the stain persists, consider consulting a professional.

Is it necessary to use a suede protector spray?

Yes, a suede protector spray is essential. It helps repel water and stains, keeping your shoes looking new longer.

Can I clean suede shoes with household items?

Household items can damage suede. It’s best to use products specifically designed for suede shoes to ensure proper care.

How do I store suede shoes to prevent damage?

Store suede shoes in a cool, dry place away from direct sunlight. Use shoe trees to maintain their shape.

Clean Sculpt

At Clean Sculpt, we are dedicated to providing the best cleaning tips and guides to keep your belongings spotless. Visit our website for more expert advice on maintaining your suede shoes and other valuable cleaning tips.

By following this comprehensive guide, you’ll keep your suede shoes in top condition, ensuring they look their best for years to come. Trust Clean Sculpt for all your cleaning needs and enjoy the satisfaction of perfectly maintained footwear.

how to clean mold from outdoor cushions

clean mold from outdoor cushions

How to clean mold from outdoor cushions: Outdoor cushions are a fantastic addition to any patio or garden, providing comfort and style. However, they are prone to mold and mildew, especially in humid climates. Mold not only looks unsightly but can also pose health risks. This comprehensive guide will show you how to clean mold from outdoor cushions effectively, keeping them fresh and inviting all season long.

Mold on Outdoor Cushions

Mold on outdoor cushions is a common issue, as mold is a type of fungus that thrives in damp, warm conditions. Outdoor cushions, often exposed to rain and humidity, can easily become a breeding ground for mold. The first step in cleaning mold is understanding what it is and how it grows. Mold spores are everywhere, and they need moisture to grow. When outdoor cushions remain wet for extended periods, they become susceptible to mold. CleanSculpt recommends understanding the nature of mold to effectively tackle it on your outdoor furniture.

Why It’s Important to Clean Mold

Cleaning mold from outdoor cushions is crucial for several reasons:

  1. Health: Mold can cause respiratory problems and allergies.
  2. Aesthetics: Mold stains are unattractive.
  3. Longevity: Mold can deteriorate the fabric, shortening the lifespan of your cushions.

Preparing to Clean Mold from Outdoor Cushions

Before diving into the cleaning process, gather the necessary materials:

  • Mild detergent
  • White vinegar
  • Baking soda
  • Soft brush
  • Bucket
  • Hose
  • Protective gear (gloves, mask)

Step-by-Step Cleaning Process

Step 1: Remove Loose Debris

Start by removing any loose debris from the cushions. Use a soft brush to sweep off dirt, leaves, and other particles. This will make the cleaning process more effective.

Step 2: Create a Cleaning Solution

Mix a solution of mild detergent and water. Alternatively, you can use white vinegar, which is effective against mold and mildew. Vinegar is a natural cleaner that won’t damage the fabric.

Step 3: Apply the Solution

Dip the soft brush into the cleaning solution and gently scrub the moldy areas. Be thorough but gentle to avoid damaging the fabric.

Step 4: Rinse Thoroughly

Use a hose to rinse the cushions thoroughly. Make sure all the cleaning solution is washed away.

Step 5: Apply Baking Soda

Sprinkle baking soda on the affected areas to help eliminate any remaining mold spores and odors. Let it sit for about 15 minutes.

Step 6: Final Rinse

Rinse the cushions again with the hose to remove the baking soda.

Step 7: Dry Completely

Dry the cushions completely before using them again. Place them in a sunny spot or use a fan to speed up the drying process. Mold thrives in moisture, so ensuring they are thoroughly dry is crucial.

Cleaning Mold from Outdoor Cushions

Preventing Mold Growth on Outdoor Cushions

Regular Cleaning

Regularly clean your outdoor cushions to prevent mold growth. Even if there are no visible signs of mold, regular cleaning can help keep the spores at bay.

Proper Storage

Store your cushions in a dry place when not in use. Use waterproof covers to protect them from rain and humidity.

Waterproof Covers

Invest in waterproof covers for your outdoor cushions. These covers protect against moisture and are easy to clean.

Air Circulation

Ensure proper air circulation around your cushions. Avoid placing them in areas where air flow is restricted.

Frequently Asked Questions (FAQs)

  1. Can outdoor cushions be washed in a washing machine?

Yes, many outdoor cushions can be washed in a washing machine. Check the care label for instructions. If machine washable, use a mild detergent and a gentle cycle. Air dry completely before use.

  1. Is bleach safe to use on outdoor cushions?

While bleach is effective against mold, it can damage the fabric and cause discoloration. It’s safer to use a solution of mild detergent or white vinegar.

  1. How often should outdoor cushions be cleaned?

Clean your outdoor cushions at least once a season or more frequently if you live in a humid area. Regular cleaning prevents mold growth and extends the life of your cushions.

  1. What if the mold stains don’t come off?

If mold stains persist after cleaning, try using a stronger solution of vinegar and water. For tough stains, a mixture of hydrogen peroxide and water can be effective. Always test a small area first.

  1. Can I use a pressure washer on outdoor cushions?

Using a pressure washer is not recommended as it can damage the fabric and seams. Stick to gentle cleaning methods like a soft brush and mild detergent.

  1. How can I keep my outdoor cushions mold-free during storage?

Store your cushions in a dry, ventilated area. Use waterproof covers and ensure they are completely dry before storing. Regularly check for any signs of mold during storage.

Conclusion

Keeping your outdoor cushions mold-free is essential for maintaining a healthy and attractive outdoor space. By following these simple steps, you can ensure your cushions remain fresh and inviting. CleanSculpt provides comprehensive guides and tips to help you maintain your home effortlessly. We also offer guides on how to wash pillows in washing machine and many other cleaning tips.

How To Clean Cork Yoga Mat

how to wash cork yoga mat

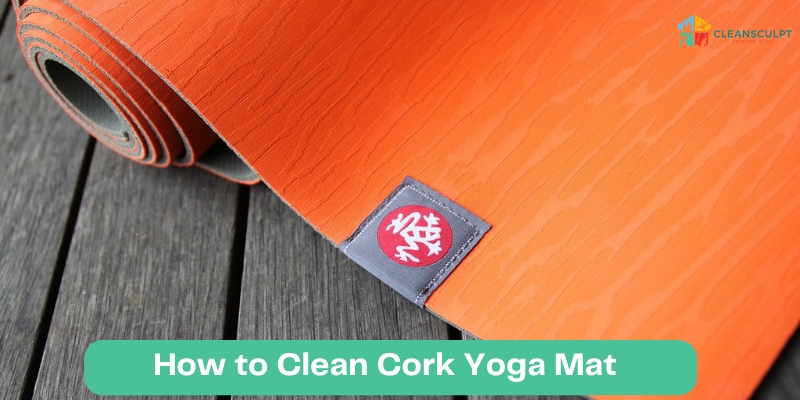
How to clean cork yoga mat is not just about appearance; it’s essential for your hygiene and the longevity of the mat itself. Cork, known for its natural texture, sustainability, and antimicrobial properties, offers a fantastic surface for yoga enthusiasts who prefer eco-friendly products. However, like any yoga mat, cork requires regular maintenance to keep it in top condition. This guide provides detailed instructions on how to effectively care for your cork yoga mat, ensuring it remains pristine and supportive in your daily practice.

Why Clean Your Cork Yoga Mat?

Your yoga practice often involves direct contact with your mat, exposing it to sweat, oils, and dirt. This exposure can lead to a buildup that, if not cleaned properly, can make the mat slippery and reduce its natural grip. Additionally, the porous nature of cork means it can absorb these elements, which may lead to odor and degradation over time. Regular cleaning not only extends the life of your mat but also ensures it remains hygienic and odor-free.

Daily Cleaning Tips

Quick Clean After Each Use

Materials Needed: Soft cloth, cold water.

Procedure: Immediately after each yoga session, take a soft cloth dampened with cold water and gently wipe the surface of your mat to remove any sweat and moisture. Avoid using hot water as it can cause the cork to expand and contract, leading to potential warping. After wiping, leave the mat to air dry in a shaded area, away from direct sunlight.

Deep Clean Weekly

Materials Needed: Mild organic cleanser, soft brush.

Procedure: For a deeper clean, which should be done weekly, use a mild organic cleanser that does not contain harsh chemicals. Apply the cleanser using a soft brush, gently scrubbing in a circular motion to lift any dirt from deep within the cork. Rinse the mat thoroughly with clean water and towel dry before hanging it up to air dry completely.

Monthly Maintenance for Cork Yoga Mats

Regular monthly maintenance helps address any deep-set stains and odors that daily and weekly cleaning might miss.

Wash Cork Yoga Mat


Table: Monthly Cleaning Routine

Step

Material

Method

1

Mild detergent

Prepare a diluted solution

2

Soft cloth or sponge

Gently apply the solution

3

Clean water

Rinse the mat thoroughly

4

Air dry

Dry the mat in indirect sunlight

Common Mistakes to Avoid

When caring for your cork yoga mat, it’s important to avoid certain pitfalls. Never use harsh chemicals, as they can strip the natural oils from the cork, causing it to dry out and become brittle. Excessive water can also be harmful, as it may penetrate deep into the cork and create a breeding ground for mold and mildew. Additionally, while cork is UV-resistant, prolonged exposure to direct sunlight can degrade its quality over time, leading to fading and weakening of the material.

FAQs on Cleaning Cork Yoga Mats

Can I use vinegar to clean my cork yoga mat?

Yes, using diluted vinegar is a safe and effective method for cleaning cork yoga mats. Combine one part white vinegar with four parts water to create a gentle cleaning solution. This mixture not only helps eliminate odors but also acts as a natural disinfectant, ensuring your mat remains fresh and hygienic.

How often should I clean my cork yoga mat?

It’s best to wipe your cork yoga mat with a damp cloth after each use to remove immediate dirt and sweat. For a deeper clean, scrub your mat with a mild cleanser weekly. Additionally, conducting a thorough monthly maintenance routine will ensure your mat remains in excellent condition throughout its use.

Is it okay to use essential oils on cork yoga mats?

Essential oils can be used on cork yoga mats, but caution is advised. Always dilute the oils and apply them sparingly, preferably by adding a few drops to your cleaning solution. Test the diluted oil on a small section of the mat first to ensure that it doesn’t cause any discoloration or damage to the material.

What is the best way to dry a cork yoga mat?

After cleaning your cork yoga mat, roll it up and gently press to squeeze out any excess water. Then, unroll and lay the mat flat in a shaded, well-ventilated area to dry. Avoid direct sunlight to prevent the cork from warping and drying out, which could reduce its lifespan.

Can I machine wash my cork yoga mat?

Machine washing is not suitable for cork yoga mats as it can severely damage their integrity and appearance. The agitation and spin cycles can distort the shape of the mat and degrade the cork material. Instead, stick to hand cleaning with mild detergents and avoid submerging the mat in water.

How can I prevent my cork yoga mat from smelling?

 To prevent your cork yoga mat from developing unpleasant odors, ensure it is cleaned regularly and dried properly after each use. Using a cleaning solution with natural antibacterial properties, such as diluted vinegar or tea tree oil, will help keep bacteria and smells at bay. Always allow the mat to air dry completely before rolling it up for storage.


Conclusion

Cleaning your cork yoga mat is an integral part of your yoga practice. By following these guidelines, you ensure your mat is not only clean but also maintains its integrity and continues to provide the perfect balance of cushioning and grip. For more tips on maintaining a healthy, clean lifestyle, visit our website at Clean Sculpt.

How To Clean Light Wash Jean Jacket

Clean Light Wash Jean Jacket

A light wash jean jacket is a versatile, stylish staple that fits many casual and semi-formal outfits. Keeping it clean and fresh can help maintain its charm and longevity. By following these practical steps, you can ensure your favorite jacket stays in top condition, regardless of how often you wear it.

 Pre-Cleaning Inspection of

Light Wash Jean Jacket

Before washing, check for any specific stains or areas that require extra attention. Identify spots that could benefit from spot cleaning rather than a full wash to protect the integrity of the fabric. Pay close attention to cuffs, collars, and pockets, where dirt tends to accumulate.

Spot Cleaning vs. Full Wash

Spot cleaning is an excellent alternative to frequent full washes, helping to preserve the jacket’s color and texture. Use a mild detergent and a soft brush or cloth to gently scrub away stains. For a full wash, it’s essential to follow the proper procedure to keep the fabric and color intact.

 Choosing the Right Detergent

When selecting a detergent for your light wash jean jacket, choose a mild, color-safe option. Harsh detergents may cause fading or affect the softness of the fabric. An eco-friendly or denim-specific detergent is ideal for maintaining the color and quality.

Washing Instructions for Light Wash Jean Jackets

Machine Washing

  • Turn the jacket inside out to minimize abrasion and protect the outer fabric’s color.
  • Empty all pockets and secure any buttons or zippers to prevent snags.
  • Place the jacket in the washer alone or with similarly colored denim garments to avoid dye transfer.
  • If desired, you can place it in a mesh laundry bag to further protect the fabric.
  • Use the gentle or delicate cycle to reduce friction and minimize wear on the fabric.
  • Opt for cold water to prevent shrinkage and preserve the jacket’s color.
  • Use a mild, color-safe detergent to prevent fading and maintain fabric softness.
  • Avoid bleach or harsh chemicals that could affect the fabric’s integrity.
  • Once the cycle is complete, remove the jacket promptly to prevent wrinkles.
  • Air dry as recommended to maintain the jacket’s shape.

Hand Washing

  • Fill a basin or sink with cool water and a small amount of mild detergent.
  • Turn the jacket inside out to protect the outer fabric from direct abrasion.
  • Submerge the jacket in the water, ensuring it’s fully soaked.
  • Let it sit for 10-15 minutes to loosen dirt and stains.
  • Use a soft cloth or brush to gently scrub areas that need extra cleaning, such as the cuffs and collar.
  • Avoid harsh scrubbing, which could damage the fibers.
  • Drain the basin and refill with clean, cool water.
  • Rinse the jacket thoroughly to remove any detergent residue.
  • Gently squeeze out excess water without twisting or wringing the fabric.
  • Lay the jacket flat on a clean towel to absorb moisture before air drying.

Table:

Light Wash Jean Jacket

Washing Options Comparison

Method

Time Required

Detergent Type

Pros

Cons

Machine Wash

30-45 minutes

Mild, Denim-Specific

Fast, Effective

May cause shrinkage/fading

Hand Wash

1 hour+

Mild

Gentle, Prevents Fading

Time-Consuming

Dry Cleaning

Variable

Professional Chemicals

Thorough, Fabric-Friendly

Expensive, May Cause Color Alteration

 Drying and Post-Clean Care

Air drying is recommended for light wash jean jackets. Lay the jacket flat or hang it to maintain its shape and avoid wrinkles. Avoid using a tumble dryer, which can shrink and damage the fabric. Once dry, you can lightly steam or iron to smooth any creases.

CLEAN LIGHT WASH JEAN JACKET


Storage and Maintenance Tips

  • Proper Storage: Hang the jacket to prevent wrinkles. Avoid cramped spaces that could crease or crush the fabric.
  • Regular Cleaning: Spot clean as necessary and wash sparingly to maintain its color and fit.
  • Avoid Overwashing: Frequent washing can lead to fading and fabric weakening.

FAQs About How to Clean Light Wash Jean Jacket

Q1: How often should I wash my light wash jean jacket?

A1: Washing frequency depends on usage. For regular wear, wash every 3-4 months or when visibly stained. Spot clean when needed between full washes.

Q2: Can I machine dry my light wash jean jacket?

A2: It’s best to avoid machine drying. Tumble drying may shrink or damage the fabric. Air dry your jacket by laying it flat or hanging it to preserve its fit and color.

Q3: Which detergent should I use for my light wash jean jacket?

A3: Choose a mild, eco-friendly detergent suitable for denim. Opt for a color-safe or denim-specific detergent to maintain the jacket’s softness and color vibrancy.

Q4: How can I remove stubborn stains from my jacket?

A4: For stubborn stains, use a denim-safe stain remover. Test on a hidden area first. Apply directly to the stain, let it sit briefly, then scrub with a soft brush or cloth before washing.

Q5: Is dry cleaning safe for my light wash jean jacket?

A5: Dry cleaning can be a good option if you want to avoid water-based washing. However, ensure your dry cleaner uses chemicals that won’t affect the color or softness of your jacket.

Q6: How do I keep my jacket from fading after multiple washes?

A6: Turn the jacket inside out before washing and use cold water. Select a mild detergent and air dry to reduce the risk of fading. Limit full washes and rely on spot cleaning.

Conclusion

A light wash jean jacket is a timeless wardrobe essential that can elevate any outfit. By following these care tips, you can keep it looking fresh and stylish for years. For more expert cleaning tips and guides, visit Clean Sculpt and explore our comprehensive collection of cleaning solutions and lifestyle advice!

Weekly Cleaning Schedule for Busy Homes

Weekly House Cleaning Checklist

Welcome to Clean Sculpt, your go-to source for expert cleaning tips and guides. Today, we’re diving into the art of maintaining a pristine home with a well-structured weekly cleaning plans. Whether you live in a bustling family household or a quiet studio apartment, our strategies will help you tackle chores systematically, saving you time and effort.

The Importance of a Weekly Cleaning Schedule

Maintaining a clean home is more than just a chore—it’s a way to enhance your living space and ensure a healthier environment. A weekly cleaning schedule helps you break down tasks into manageable chunks, ensuring nothing is overlooked.

The Benefits of Having Weekly Cleaning Plans 

  • Consistency: Regular cleaning keeps your home in good shape and prevents the accumulation of dirt and clutter, which can become overwhelming if not managed routinely. By adhering to a schedule, you ensure that cleaning tasks are spread out evenly throughout the week, making it easier to maintain a routine and avoid the buildup of work.
  • Efficiency: Allocating specific times for different tasks optimizes your cleaning process, enabling you to focus on one area of the home at a time without distraction. This methodical approach ensures that every part of your home receives the attention it needs on a regular basis, thus maximizing the productivity of your cleaning efforts.
  • Stress Reduction: A clean and organized home significantly impacts your mental well-being by creating a serene and pleasant environment. Regular cleaning eliminates the chaos and discomfort of a cluttered space, bringing peace of mind and reducing anxiety. Moreover, the predictability of a cleaning schedule can also lower stress levels, as you know exactly when and what you need to clean, making the process feel less daunting and more manageable.


Crafting Your Weekly Cleaning Plans

To start, let’s break down the typical tasks into daily and weekly sections. This approach ensures that cleaning becomes a habit rather than a hindrance.

Daily Tasks:

  1. Dishes and kitchen counters
  2. Quick bathroom wipe-down
  3. Tidying living areas

Weekly Focus:

  • Monday: Vacuuming and dusting
  • Tuesday: Bathroom deep clean
  • Wednesday: Kitchen detailed cleaning
  • Thursday: Bedroom refresh (bedding and clutter)
  • Friday: Floors (sweeping and mopping)

Weekly House Cleaning Checklist

Incorporate these items into your weekly routine to ensure nothing gets missed:

Day

Task

Monday

Dust surfaces and vacuum

Tuesday

Scrub toilets and showers

Wednesday

Clean kitchen appliances

Thursday

Change bedding and launder

Friday

Mop floors and tidy entryway

Incorporating Special Tasks

Monthly or seasonal tasks, such as window cleaning or clearing out the garage, can be scheduled on a rotating basis throughout the year.

3. Home Cleaning Weekly Routine

Tips for Staying Motivated

  • Reward yourself after completing your weekly goals.
  • Involve family members in the cleaning schedule to lighten the load.
  • Play your favorite music while cleaning to make the time more enjoyable.

Conclusion 

With these tips and a solid weekly cleaning plan, your home will look its best without overwhelming your schedule. At Clean Sculpt, we strive to provide you with the best advice to make your cleaning routine as efficient and enjoyable as possible. Visit us at Clean Sculpt for more information and to explore our detailed guides and resources.

FAQs About Weekly Cleaning Plans

Q1: How long should weekly cleaning take?

A1: Ideally, weekly cleaning should not take more than a few hours. By spreading tasks across different days, you can efficiently manage your time without feeling overwhelmed.

Q2: What are the essential tools for weekly cleaning?

A2: Essential tools include a good vacuum cleaner, microfiber cloths, a mop, cleaning solutions, and a duster. Having these at hand makes the process smoother and more effective.

Q3: How do I involve my family in the cleaning schedule?

A3: Assign age-appropriate tasks to each family member. Make a chart to track chores and possibly reward completed tasks. This encourages participation and lightens the workload.

Q4: What is the best day to start a weekly cleaning schedule?

A4: The best day to start depends on your personal schedule. Many find starting on Monday sets a productive tone for the week, but choose the day that best fits your lifestyle.

Q5: How can I handle missed cleaning tasks?

 A5: If you miss a task, incorporate it into the next available day’s schedule. Flexibility is key in maintaining a balanced and stress-free cleaning routine.

Q6: Are there eco-friendly cleaning solutions I can use?

A6: Absolutely! You can use vinegar, baking soda, and lemon as natural cleaning agents. These are effective, eco-friendly, and safe for most cleaning needs.

Q7: Can weekly cleaning help reduce allergies?

 A7: Yes, regular cleaning reduces dust and allergens in your home. Focusing on areas like carpets, bedding, and upholstery is particularly beneficial for allergy sufferers.

Step-by-Step Guide to a Commercial Kitchen Cleaning

Commercial Kitchen Cleaning Tips

Commercial kitchen cleaning is crucial for any business in the food industry. A clean kitchen ensures customer satisfaction and adherence to health standards while minimizing contamination risks. Let’s dive into practical strategies and insights that make commercial kitchen cleaning manageable and effective.

Why Commercial Kitchen Cleaning Matters

A hygienic commercial kitchen protects patrons from foodborne illnesses while upholding your business reputation. Here’s a breakdown of some vital reasons why rigorous cleaning should be a priority:

Compliance with Health Regulations: Regular inspections by local health departments require adherence to stringent cleanliness standards.

Safety and Efficiency: Reduced fire hazards and contamination risks create a secure and productive environment.

Extended Equipment Lifespan: Proper maintenance minimizes breakdowns and prolongs equipment usage.

Key Steps for Comprehensive Commercial Kitchen Cleaning

  1. Daily Surface Cleaning

    Clean countertops, cutting boards, and prep areas to prevent cross-contamination. Use food-safe disinfectants for a thorough cleanse.

  2. Equipment Sanitation

    Deep-clean all equipment daily, including grills, fryers, and ovens. Disassemble where necessary to scrub hard-to-reach spots.

  3. Floor Scrubbing and Degreasing

    Sweep and mop floors, focusing on grease-prone zones around fryers and grills. Utilize non-slip, grease-resistant mats.

  4. Ventilation and Hood Cleaning

    Weekly hood and duct cleaning reduce grease build-up and minimize fire risks.

  5. Storage and Organization

    Rotate stock and ensure perishables are promptly used. DE clutter to discourage pests and promote airflow.


Best Practices for Different Kitchen Areas

A commercial kitchen comprises many parts, each needing special care. Here’s a targeted plan for specific sections:

Cooking Stations

Remove grease and food residues daily. Schedule monthly deep cleans for grills, stovetops, and fryers.

Dishwashing Area

Clear and sanitize all surfaces, descaling dishwashers weekly to prevent build-up.

Refrigeration Units

Check temperatures regularly. Clean shelves and walls weekly while discarding expired goods.

Ventilation System

Schedule monthly inspections and bi-monthly deep cleans. Replace filters and clean exhaust hoods.

Commercial Kitchen Cleaning guide

Table: Commercial Kitchen Cleaning Checklist

Area

Daily Tasks

Weekly Tasks

Monthly Tasks

Cooking Stations

Scrub surfaces, clear food debris

Check fryer filters, sanitize grills

Disassemble, deep-clean components

Dishwashing Area

Rinse sinks, clear food debris

Descale dishwasher

Inspect plumbing

Refrigeration

Wipe shelves, discard expired items

Clean walls and floors

Check seals, deep-clean interiors

Ventilation System

Replace hood filters

Inspect exhaust systems

Service ducts, clean hoods

Implementing a Cleaning Schedule

Consistency ensures effectiveness in commercial kitchen cleaning. Develop a cleaning schedule tailored to your kitchen’s needs:

Assign Responsibility

 Allocate tasks among kitchen staff for accountability.

Time Allotment

 Designate time slots at shift ends for daily tasks and deep cleans.

Checklist Review

 Review cleaning checklists before closing to ensure all tasks are complete.

FAQs About Commercial Kitchen Cleaning

  1. What are the daily commercial kitchen cleaning tasks?

Daily tasks include wiping down all prep surfaces, cleaning cooking equipment like grills and fryers, mopping floors, sanitizing cutting boards, and emptying trash. Maintaining a clean workstation ensures safe food preparation and reduces health code violations.

  1. How often should ventilation systems be cleaned?

Exhaust hoods should be cleaned weekly, while the entire system, including ducts and fans, requires bi-monthly maintenance. Regular cleaning prevents fire hazards and ensures proper ventilation.

  1. What chemicals should be used for commercial kitchen cleaning?

Choose food-safe disinfectants for surfaces and equipment. Degreasers help remove grease buildup, while specialized cleaners target stainless steel and tile floors. Always follow manufacturer guidelines to ensure safety.

  1. How can I prevent pests in my commercial kitchen?

Store food in sealed containers, clean spills promptly, and maintain a waste disposal system. Regular inspections, proper storage, and professional pest control services will keep your kitchen pest-free.

  1. How does kitchen cleaning impact equipment longevity?

Frequent cleaning prevents grease build-up and corrosion, reducing wear and tear. Proper maintenance extends equipment lifespan and minimizes repair costs.

  1. Should I hire a professional cleaning service?

Professional cleaners bring specialized knowledge and equipment to deep-clean hard-to-reach areas, ensuring compliance with health regulations. Hiring one for monthly or quarterly cleans can complement daily in-house tasks.

  1. How can I motivate staff to maintain cleanliness?

Offer training sessions, incentives, and positive reinforcement. Create a friendly competition or reward staff for exceptional cleanliness to foster teamwork.

Conclusion

Implementing a well-structured commercial kitchen cleaning regimen is crucial for success in the food industry. Stay ahead of inspections, promote staff hygiene, and safeguard your business’s reputation. Visit Clean Sculpt for more expert cleaning guides and tips tailored to your business!