G-NK1NZZ9XJG

How to wash blackout curtains

How to wash blackout curtains

How to wash blackout curtains: Blackout curtains are a lifesaver when creating a cozy and dark environment for sleeping or watching movies. However, over time, they can accumulate dust, dirt, and stains, affecting their effectiveness and appearance.

Knowing how to properly wash blackout curtains is essential to maintain their functionality and beauty. In this blog post, we’ll share expert tips and tricks on how to wash blackout curtains effectively. So you can keep your space dark and stylish.

How to wash blackout curtains

1. Read the Care Label:

Before washing your blackout curtains, check the care label for specific instructions. Some curtains may be machine washable, while others require dry or spot cleaning only.

2. Remove Dust and Debris:

Start by gently vacuuming or shaking your blackout curtains to remove any loose dust or debris. This helps prevent dirt from embedding into the fabric during washing.

3. Test for Colorfastness:

Before proceeding with washing, test a small inconspicuous area of the curtain for colorfastness. Dampen a white cloth with water and gently rub it on the fabric to check for color transfer.

4. Machine Wash or Hand Wash:

Depending on the care label instructions, you can either machine wash your blackout curtains on a gentle cycle with cold water or hand wash them in a bathtub or large basin.

5. Use a Mild Detergent:

Choose a mild detergent that is suitable for delicate fabrics to avoid damaging the blackout curtain’s coating or fibers. Avoid using bleach or harsh chemicals.

6. Avoid Overloading the Machine:

If machine washing, avoid overloading the washing machine to ensure proper cleaning and prevent wrinkling. Wash the curtains separately or with other lightweight fabrics.

7. Hang or Air Dry:

After washing, hang your blackout curtains to air dry or lay them flat on a clean surface. Avoid using a dryer, as high heat can damage the blackout coating and shrink the fabric.

8. Iron or Steam if Necessary:

If your blackout curtains are wrinkled after drying, you can use a steam iron or garment steamer on a low heat setting to smooth out the fabric. Always test a small area first.

9. Rehang and Enjoy:

Once dry and wrinkle-free, rehang your blackout curtains and enjoy their renewed freshness and effectiveness in blocking out light and noise.

Blackout curtains cleaning

FAQs

Can blackout curtains be washed in a washing machine?

Yes, many blackout curtains are machine washable. However, always check the care label for specific washing instructions, such as water temperature and cycle settings.

Can I use fabric softener when washing blackout curtains?

It’s best to avoid using fabric softener on blackout curtains, as it can diminish their light-blocking effectiveness. Opt for a mild detergent instead.

How often should I wash my blackout curtains?

The frequency of washing depends on factors such as dust accumulation and exposure to pet hair or odors. As a general guideline, aim to wash blackout curtains every 3-6 months.

Can blackout curtains be ironed?

Yes, blackout curtains can be ironed on a low heat setting if needed to remove wrinkles. However, avoid direct contact with the blackout coating, as high heat can damage it.

Conclusion

By following these expert tips on how to wash blackout curtains, you can ensure they remain clean, effective and stylish for years to come. Maintain the darkness and coziness of your space while keeping your blackout curtains looking their best with proper care and washing techniques.

How to wash alpaca blanket

How to wash alpaca blanket

Alpaca blankets are prized for their exceptional softness, warmth, and durability. Made from the fibers of the alpaca, these blankets offer luxurious comfort and are a favorite choice for cozying up on chilly nights.

However, knowing how to  wash  alpaca blanket is essential to preserve its quality and longevity. In this blog post, we will delve into the art of washing alpaca blankets, sharing expert tips and tricks to keep them looking and feeling like new.

How to wash alpaca blanket

1. Check the Care Label:

Before washing your alpaca blanket, carefully read the care label for specific instructions. Some alpaca blankets may be machine washable, while others may require hand washing or dry cleaning.

2. Use Cold Water:

When washing an alpaca blanket, opt for cold water to prevent shrinkage and preserve the natural fibers. Avoid hot water, as it can cause the blanket to felt or lose its softness.

3. Choose a Gentle Detergent:

Select a gentle detergent specially formulated for delicate fabrics or wool. Avoid using harsh detergents or bleach, as they can damage the fibers and affect the color of the blanket.

4. Hand Wash or Use a Delicate Cycle:

If hand washing, gently submerge the alpaca blanket in a basin of cold water mixed with detergent. Gently agitate the water to distribute the detergent, then rinse thoroughly and carefully squeeze out excess water without wringing.

5. Air Dry Flat:

Lay the alpaca blanket flat on a clean surface to air dry. Avoid hanging it, as this can cause stretching or distortion of the fibers. Flip the blanket occasionally to ensure even drying.

6. Brush Out Any Pilling:

After drying, use a soft-bristled brush to gently remove any pilling or lint from the surface of the alpaca blanket. This helps maintain its smooth texture and appearance.

7. Store Properly:

When not in use, store your clean and dry alpaca blanket in a breathable fabric storage bag or folded neatly in a dry, cool place. Avoid storing it in plastic bags or containers, as this can trap moisture and lead to mildew growth.

How to wash alpaca blanket

Additional Steps for Washing an Alpaca Blanket:

Avoid Agitation:

When hand washing or using a washing machine, avoid excessive agitation or wringing of the alpaca blanket. Gentle handling helps preserve the softness and structure of the fibers.

Use a Laundry Bag:

If machine washing, place the alpaca blanket in a mesh laundry bag to protect it from snagging or tangling with other items in the wash cycle. This prevents damage to the delicate fibers.

Rinse Thoroughly:

After washing, rinse the alpaca blanket thoroughly to remove all traces of detergent. Residual detergent can cause stiffness or discoloration, affecting the overall feel and appearance of the blanket.

Dry in Shade:

When air drying the alpaca blanket, avoid direct sunlight as it can fade the colors and cause the fibers to become brittle. Choose a shaded area with good air circulation for drying.

Use a Towel for Absorbency:

After gently squeezing out excess water, lay the alpaca blanket on a clean towel and roll it up to absorb more moisture. Press gently without wringing to remove additional water.

Avoid Ironing:

Alpaca fibers are naturally resilient and do not require ironing. Avoid using a hot iron on the blanket, as it can damage the fibers and affect the texture.

Store with Care:

Store your clean and dry alpaca blanket in a breathable storage bag or folded neatly in a cool, dry place. Avoid storing it in plastic bags or containers, as this can trap moisture and lead to odors or mold growth.

Professional Cleaning:

For heavily soiled or stained alpaca blankets, consider professional cleaning services. Professional cleaners have the expertise and equipment to safely clean and restore the blanket’s quality without causing damage.

FAQs

Can I wash my alpaca blanket in a washing machine?

Some alpaca blankets may be machine washable, but always check the care label for specific instructions. Use a gentle cycle with cold water and mild detergent to avoid damage.

Is it safe to use fabric softener on alpaca blankets?

It’s best to avoid using fabric softener on alpaca blankets, as it can coat the fibers and affect their natural softness. Opt for a mild detergent designed for delicate fabrics instead.

Can I dry my alpaca blanket in a dryer?

It’s not recommended to tumble dry alpaca blankets, as the heat can cause shrinkage and damage the fibers. Air drying flat is the best method to preserve the blanket’s quality.

How often should I wash my alpaca blanket?

The frequency of washing depends on how often the blanket is used and if it gets visibly dirty. As a general guideline, wash your alpaca blanket every few months or as needed.

Can I spot clean stains on my alpaca blanket?

Spot cleaning is suitable for minor stains on alpaca blankets. Use a mild detergent or stain remover and gently blot the affected area. Avoid rubbing vigorously to prevent damage to the fibers.

Conclusion:

By following these expert tips on how to wash alpaca blankets, you can ensure that your cherished blanket remains soft, cozy, and beautiful for years to come. Treat your alpaca blanket with care, and it will reward you with luxurious comfort every time you use it.

How to wash a Mexican blanket

How to wash a Mexican blanket

Mexican blankets are beloved for their vibrant colors, intricate patterns and versatility. Whether used as a cozy throw, a picnic blanket or a stylish home decor accent, these blankets add a touch of warmth and culture to any space. However, knowing how to properly care for and  Mexican blanket washing is essential to ensure its longevity and vibrant appearance. In this blog post, we will share expert tips and tricks on how to wash a Mexican blanket effectively, so you can continue to enjoy its beauty and functionality for years to come.

Mexican blanket Washing

1. Check the Care Label:

Before washing your Mexican blanket, check the care label for specific washing instructions. Some blankets may be machine washable, while others may require hand washing or dry cleaning.

2. Pre-Treat Stains:

If your Mexican blanket has any stains or spots, pre-treat them with a mild stain remover or a mixture of water and gentle detergent. Gently rub the solution into the affected areas and let it sit for a few minutes before washing.

3. Choose the Right Washing Method:

Depending on the care label instructions, wash your Mexican blanket in the appropriate method. For machine-washable blankets, use a gentle cycle with cold water to prevent color fading and shrinkage.

4. Use a Mild Detergent:

Opt for a mild detergent that is suitable for delicate fabrics to avoid damaging the fibers of your Mexican blanket. Avoid using bleach or harsh chemicals, as they can strip away the colors and patterns.

5. Air Dry or Tumble Dry Low:

After washing, air dry your Mexican blanket by laying it flat on a clean surface or hanging it on a clothesline. If using a dryer, choose a low heat setting to prevent excessive shrinking and maintain the integrity of the fabric.

6. Avoid Direct Sunlight:

To preserve the vibrant colors of your Mexican blanket, avoid exposing it to direct sunlight for extended periods. UV rays can cause fading and dullness over time.

7. Store Properly:

When not in use, store your Mexican blanket in a cool, dry place away from moisture and humidity. Avoid folding or storing it in plastic bags, as this can trap moisture and lead to mildew growth.

 mexican blanket washing

Additional Steps For Mexican Blanket Washing:

Use a Delicate Cycle:

If machine-washing your Mexican blanket, select a delicate or gentle cycle to minimize agitation and prevent damage to the fabric and delicate fibers.

Avoid Overloading the Washing Machine:

To ensure thorough cleaning and prevent tangling, avoid overloading the washing machine with too many blankets or other items. This allows the Mexican blanket to move freely during the wash cycle.

Rinse Thoroughly:

After washing, rinse your Mexican blanket thoroughly to remove any residual detergent or soap suds. Residual detergent can cause stiffness and affect the softness of the fabric.

Do Not Wring or Twist:

Avoid wringing or twisting your Mexican blanket to remove excess water, as this can stretch or damage the fibers. Instead, gently squeeze out excess water by pressing the blanket between clean towels.

Air Dry Flat:

Lay your Mexican blanket flat on a clean surface to air dry. Avoid hanging it over a clothesline, as this can cause stretching or distortion of the fabric. Flip the blanket occasionally to ensure even drying.

Brush Out Any Pilling:

After drying, gently brush your Mexican blanket with a soft-bristled brush to remove any pilling or lint. This helps maintain the smooth texture and appearance of the fabric.

Steam or Iron if Necessary:

If your Mexican blanket has wrinkles or creases, you can use a steamer or iron on a low heat setting to smooth out the fabric. Always test a small, inconspicuous area first to ensure the heat does not damage the colors or patterns.

Store Properly:

When not in use, store your Mexican blanket in a breathable fabric storage bag or folded neatly in a dry, cool place. Avoid storing it in plastic bags or containers, as this can trap moisture and lead to musty odors or mildew growth.

FAQs

Can I wash my Mexican blanket in a washing machine?

Yes, many Mexican blankets are machine washable. However, always check the care label for specific washing instructions and use a gentle or delicate cycle with cold water to avoid damage.

How often should I wash my Mexican blanket?

The frequency of washing depends on how often the blanket is used and if it gets visibly dirty. As a general guideline, wash your Mexican blanket every few months or as needed to keep it fresh and clean.

Can I use fabric softener on my Mexican blanket?

It’s best to avoid using fabric softener on Mexican blankets, especially those made of wool or acrylic, as it can affect the texture and absorbency of the fabric. Instead, opt for a mild detergent.

Is it safe to spot clean my Mexican blanket?

Spot cleaning is suitable for minor stains or spills on Mexican blankets. Use a mild detergent or stain remover and gently blot the affected area with a clean cloth. Avoid scrubbing vigorously to prevent damage to the fibers.

Conclusion:

By following these simple yet effective tips on how to wash a Mexican blanket, you can ensure that it remains vibrant, soft and beautiful for years to come. Showcasing the rich cultural heritage of Mexico, these blankets are not just functional but also a work of art that adds warmth and personality to any home. Treat your Mexican blanket with care and enjoy its beauty for generations to come.

How to wash white clothes

white clothes washing

White clothes are a classic wardrobe staple, exuding elegance and versatility. However, keeping them pristine can be challenging, as they are prone to stains and discoloration. In this blog post, we will share expert tips and tricks on white clothes washing effectively, so you can maintain their brightness and freshness for longer.

Guide For white clothes Washing

1. Sort Your Whites:

Before starting the white clothes washing process, separate your white clothes from colored garments to prevent color transfer. This ensures that your whites remain bright and free from any unwanted hues.

2. Pre-Treat Stains:

For stubborn stains, pre-treat the affected areas with a stain remover or a mixture of water and detergent. Gently rub the solution into the fabric and let it sit for a few minutes before washing.

3. Use the Right Detergent:

Opt for a high-quality detergent specifically formulated for whites, as it contains brightening agents that help restore the whiteness of your clothes. Avoid using bleach on delicate fabrics, as it can weaken the fibers over time.

4. Wash in Cold Water:

Wash your white clothes in cold water to prevent shrinkage and preserve the integrity of the fabric. Cold water also helps prevent colors from bleeding and keeps whites looking crisp and bright.

5. Choose the Proper Cycle:

Select a gentle cycle on your washing machine to avoid unnecessary wear and tear on your white clothes. Aggressive cycles can cause friction and damage the fabric, leading to premature yellowing or pilling.

6. Hang to Dry:

After washing, air-dry your white clothes in the sun if possible, as sunlight has natural bleaching properties that can help whiten fabrics. Alternatively, use a clothesline or drying rack indoors to prevent shrinking and maintain the shape of your garments.

7. Store Properly:

Once dry, store your white clothes in a clean, dry place away from direct sunlight to prevent yellowing or discoloration. Avoid storing them in plastic bags or containers, as trapped moisture can promote mildew growth.

white clothes washing

Additional Steps for  White Clothes Washing:

Avoid Overloading the Washing Machine:

Overloading the washing machine can prevent clothes from getting properly cleaned and may lead to uneven washing. Ensure there is enough space for water and detergent to circulate freely.

Use a Fabric Softener for White Clothes Washing:

Adding a fabric softener to the wash cycle can help keep white clothes soft and reduce static cling. It also imparts a pleasant fragrance to your laundry.

Check Care Labels:

Always check the care labels on your white clothes for specific washing instructions. Some fabrics may require special care, such as gentle cycles or hand washing.

Inspect Clothes Before Washing:

Before tossing your white clothes into the washing machine, check for any hidden stains or spots that may need pre-treatment. Addressing stains early can prevent them from setting in.

Turn Clothes Inside Out:

Turning white clothes inside out before washing can help preserve their color and reduce wear on the outer surface. This is especially important for printed or embellished garments.

Use a Mesh Laundry Bag:

For delicate white items such as lace or lingerie, consider using a mesh laundry bag to protect them during the wash cycle. This prevents snags and damage to delicate fabrics.

Avoid Using Too Much Detergent:

Using excessive detergent can leave residue on your white clothes, leading to a dull appearance. Follow the recommended dosage on the detergent packaging for optimal cleaning results.

Inspect Clothes After Washing:

After washing, carefully inspect your white clothes for any remaining stains or discoloration. Treat any lingering stains before drying to prevent them from becoming permanent.

FAQs

Should I wash white clothes separately from colored garments?

Yes, it’s best to wash white clothes separately from colored garments to prevent color transfer and maintain the brightness of your whites.

Can I use bleach to whiten my white clothes?

While bleach can be effective for whitening, it should be used sparingly and only on sturdy fabrics. Avoid using bleach on delicate or colored fabrics, as it can cause damage and discoloration.

What should I do if my white clothes turn yellow?

If your white clothes develop a yellow tint over time, try soaking them in a mixture of water and white vinegar before washing. White vinegar has natural whitening properties that can help remove yellowing.

Is it safe to wash white clothes in hot water?

Hot water can be effective for removing tough stains, but it can also cause shrinkage and damage to delicate fabrics. It’s generally recommended to wash white clothes in cold or warm water to preserve their quality.

How often should I wash white clothes?

The frequency of washing white clothes depends on how often they are worn and the level of dirt or stains. As a general guideline, wash white clothes after every few wears to keep them looking fresh and clean.

Conclusion:

With the right care and attention, washing white clothes can be a breeze. By following these simple yet effective tips, you can keep your whites looking bright and beautiful wash after wash. Say goodbye to dingy whites and hello to a wardrobe filled with pristine garments that radiate freshness and style.

How to wash pillows in washing machine Complete Guide

How to wash pillows in washing machine

How to wash pillows in washing machine: Pillows are essential for a good night’s sleep, but over time, they can accumulate dust, sweat, and other debris, leading to a less-than-fresh sleeping experience. Washing your pillows in the washing machine is a simple and effective way to keep them clean and hygienic. However, not all pillows can be washed in the same way.

So it’s important to know the proper techniques for washing different types of pillows. In this guide, we’ll walk you through the process of washing pillows in the washing machine, so you can enjoy a clean and comfortable night’s sleep.

How to wash pillows in washing machine

Step 1: Check the Care Label

Before washing your pillows, always check the care label for any specific instructions. Some pillows may require special care, such as dry cleaning or spot cleaning only. If your pillows are machine washable, proceed to the next step.

Step 2: Pre-treat Stains

If your pillows have any stains, it’s a good idea to pre-treat them before washing. Simply apply a small amount of detergent or a stain remover directly to the stain and gently rub it in. Let it sit for a few minutes before washing.

Step 3: Load the Washing Machine

Place your pillows in the washing machine, making sure not to overcrowd the machine. If you have multiple pillows, it’s best to wash them in pairs to ensure even washing.

Step 4: Choose the Right Cycle and Temperature

Select a gentle cycle and use warm water to wash your pillows. Avoid using hot water, as this can damage the fibers in the pillows. Add a small amount of mild detergent to the washing machine.

washing pillows in washing machine

Step 5: Rinse and Spin

After the washing cycle is complete, run an extra rinse cycle to ensure that all the detergent is removed from the pillows. Then, run a spin cycle to remove excess water from the pillows.

Step 6: Dry the Pillows

Place your pillows in the dryer with a couple of tennis balls or dryer balls to help fluff them up. Use a low heat setting and periodically check the pillows to ensure they are drying evenly. Alternatively, you can air dry your pillows by laying them flat on a clean towel in a well-ventilated area.

Step 7: Fluff and Enjoy

Once your pillows are completely dry, fluff them up by giving them a good shake or using your hands to redistribute the filling. Your pillows are now clean, fresh, and ready for another night of comfortable sleep.

Step 8: Consider Using a Pillow Protector

To keep your pillows cleaner for longer, consider using a pillow protector. These covers are designed to fit over your pillows and provide an extra layer of protection against dust, dirt, and stains. Pillow protectors are typically machine washable, so you can easily remove and clean them along with your pillowcases.

Step 9: Fluff and Rotate Regularly

To maintain the shape and support of your pillows, it’s important to fluff them regularly. This helps redistribute the filling and prevents it from becoming lumpy. Additionally, rotating your pillows every few months can help ensure even wear and extend their lifespan.

Step 10: Replace When Necessary

Despite your best efforts to clean and maintain them, pillows will eventually wear out and lose their shape and support. If your pillows are no longer comfortable or have noticeable lumps, it may be time to replace them. As a general rule, pillows should be replaced every 1-2 years, depending on their quality and usage.

FAQs

Can I wash all types of pillows in the washing machine?

A: Not all pillows can be washed in the washing machine. Check the care label on your pillows for specific instructions. Some pillows may require dry cleaning or spot cleaning only.

How often should I wash my pillows?

It’s recommended to wash your pillows every 3-6 months to remove dust, sweat, and other debris. However, if you have allergies or respiratory issues, washing them more frequently may be beneficial.

Can I use bleach to whiten my pillows?

A: It’s not recommended to use bleach on pillows, as it can damage the fibers and reduce their lifespan. Instead, use a mild detergent and follow the care label instructions for best results.

How do I know when my pillows are dry?

A: Pillows can take several hours to dry completely. To check if they’re dry, press down on the pillow with your hand. If it feels dry and springy, it’s ready. If it feels damp or clumpy, continue drying until it’s completely dry.

Conclusion

Washing pillows in the washing machine is a simple and effective way to keep them clean and fresh. By following the steps outlined in this guide and incorporating them into your regular cleaning routine, you can ensure that your pillows remain comfortable and hygienic for years to come. So, say goodbye to dusty, lumpy pillows and hello to a restful night’s sleep on clean, fluffy pillows.


How to wash hey dudes

How to wash hey dudes


Welcome to your go-to resource for keeping your Hey Dude shoes looking fresh and new! In this guide, we’ll explore various effective techniques to clean your Hey Dude sneakers, ensuring they last longer while maintaining their comfort and style.

What You Need to Know About Hey Dude Shoes

Hey Dude shoes are renowned for their comfort and durability, crafted primarily from canvas and other washable materials. This makes them a favorite for casual wear, but it also means they require regular maintenance to stay in top condition.

Wash Hey Dude Sneakers

Materials Required:
  • Soft brush or toothbrush
  • Mild detergent
  • Baking soda
  • Clean cloth
  • Warm water

Step-by-Step Hey Dudes Washing Guide:

  1. Prepare Your Shoes: Remove laces and insoles. This makes it easier to clean all parts of the shoes thoroughly.
  2. Dry Brushing: Use a soft brush to remove loose dirt and debris.
  3. Create Cleaning Solution: Mix mild detergent with warm water to form a soapy solution.
  4. Wash: Dip the brush into the solution and gently scrub the shoes. For stubborn stains, apply a paste of baking soda and water, and let it sit for a few minutes before scrubbing.
  5. Rinse and Dry: Wipe the shoes with a cloth dampened with clean water. Air dry away from direct heat or sunlight.

Maintaining Your Hey Dudes Sneakers

Regular maintenance is key to extending the life of your Hey Dude shoes. Here are some tips:

  • Regular Cleaning: Clean your shoes as soon as they get dirty to prevent stains from setting.
  • Proper Storage: Store your Hey Dudes in a cool, dry place away from sunlight.
  • Avoid Harsh Chemicals: Use only mild detergents to avoid damaging the fabric.

DIY Cleaning for Hey Dudes

For a quick refresh, you can use everyday household items:

  • Baking Soda: Great for removing odors and light stains.
  • Vinegar Solution: Mix vinegar with water for a natural disinfectant spray.

Refresh Hey Dude Casual Shoes

Sometimes, all your shoes need is a quick refresh to restore their look and feel:

  • Spot Cleaning: Quick wipes can remove fresh stains and spills.
  • Odor Removal: Sprinkle baking soda inside your shoes overnight and vacuum it out the next morning.

Table: Comparison of Hey Dude Shoe Cleaning Methods

Method

Type

Time

Effectiveness

Baking Soda Paste

Stain Removal

15 min

High

Vinegar Spray

Disinfection

10 min

Medium

Soapy Water Scrub

Deep Clean

30 min

High

FAQs

Can I wash my Hey Dude shoes in the washing machine?

Yes, Hey Dude shoes can be washed in the washing machine. However, it’s recommended to use a gentle cycle with cold water and place them in a mesh laundry bag to protect them during the wash.

How should I dry my Hey Dude shoes after washing them?

After washing your Hey Dude shoes, it’s best to air dry them in a well-ventilated area away from direct heat or sunlight. Avoid using a dryer, as the heat can cause the shoes to shrink or lose their shape.

Can I use bleach to clean my Hey Dude shoes?

No, bleach should not be used to clean Hey Dude shoes, as it can damage the materials and cause discoloration. Instead, use a mild detergent or specialized shoe cleaner to gently scrub away dirt and stains.

How often should I wash my Hey Dude shoes?

The frequency of washing your Hey Dude shoes depends on how often you wear them and the conditions you expose them to. As a general rule, it’s a good idea to clean them whenever they start to look dirty or smell unpleasant.

Conclusion

How to properly wash and care for your Hey Dude shoes is essential for keeping them looking and feeling their best. By following the steps outlined in this guide and incorporating them into your shoe care routine, you can ensure that your Hey Dude shoes remain fresh, comfortable, and stylish for years to come.

Whether you are hiking in the great outdoors or strolling through the city streets, your Hey Dudes will be your trusted companions every step of the way. So, don’t let dirt and grime dull their shine give your Hey Dude shoes the care they deserve and enjoy many more adventures in comfort and style.

For more cleaning tips and guides, check out our website, Clean Sculpt, where we help you keep everything in pristine condition!

How to wash Squish Mallow

How to wash a Squish Mallow

Washing Squish Mallow: Squish mallows have taken the world by storm with their irresistibly soft and huggable design. Whether you have a plush unicorn, a cuddly panda, or a lovable dinosaur, one thing is for sure these adorable creatures quickly become cherished companions.

But as they accompany us on our adventures and snuggle up with us at night, they inevitably gather dust and dirt. Fear not, for we are here to guide you through the process of washing Squish mallow, ensuring that your cuddly friend stays clean, fresh, and ready for endless hugs.

Washing Squish mallow

As guardians of these beloved plushies, it’s our responsibility to keep them in tip-top shape. Washing your Squish mallow not only removes dirt and odors but also helps maintain its fluffy texture and vibrant colors.

So, grab your gentle detergent and let’s embark on this cleaning journey to ensure that your Squish mallow remains a loyal and huggable companion for years to come.

Gentle Hand Washing:

  • Fill a basin or sink with lukewarm water and add a small amount of gentle detergent.
  • Submerge your Squishmallow in the water and gently knead it to work the detergent through the fabric.
  • Rinse thoroughly with clean water until all soap residue is removed.
  • Squeeze out excess water gently without wringing or twisting the plushie.
  • Air dry your Squish mallow by laying it flat on a towel or hanging it to dry. Avoid direct sunlight and heat sources, as they may damage the fabric.

Machine Washing:

  • Place your Squish mallow in a mesh laundry bag or pillowcase to protect it during the wash cycle.
  • Use a gentle cycle with cold water and mild detergent. Avoid using bleach or fabric softener.
  • After the wash cycle is complete, remove the Squish mallow from the laundry bag or pillowcase.
  • Gently squeeze out excess water and reshape the plushie if necessary.
  • Air dry your Squish mallow by laying it flat on a towel or hanging it to dry. Avoid using a dryer, as it may cause the fabric to shrink or lose its softness.

Spot Cleaning:

  • For minor stains or spills, spot clean your Squish mallow using a damp cloth or sponge.
  • Dab the affected area with a mixture of water and mild detergent, then blot with a clean cloth to remove excess moisture.
  • Allow the plushie to air dry completely before cuddling up with it again.

Brushing and Fluffing:

  • Use a soft-bristled brush or comb to gently fluff and smooth out your Squish mallow’s fur or fabric after washing.
  • Brush in the direction of the fabric’s nap to restore its fluffy texture and appearance.
  • Pay extra attention to any areas that may have flattened during the washing process, such as the head or limbs.

Refreshing Techniques:

  • To keep your Squish mallow smelling fresh between washes, sprinkle a small amount of baking soda over it and let it sit for a few hours before brushing or shaking off the powder.
  • Alternatively, you can lightly mist your Squish mallow with a mixture of water and fabric softener to give it a pleasant scent.

With these simple yet effective washing techniques, you can keep your Squish mallow looking and feeling like new for many cuddle-filled adventures to come. So, don’t hesitate to give your beloved plushie the TLC it deserves and enjoy countless moments of cozy companionship together.

FAQs

Can I machine wash my Squish mallow?

Yes, you can machine wash your Squish mallow. Place it in a mesh laundry bag or pillowcase to protect it during the wash cycle, and use a gentle cycle with cold water and mild detergent.

Can I use bleach or fabric softener when washing my Squish mallow?

It’s best to avoid using bleach or fabric softener when washing your Squish mallow, as these may damage the fabric or affect its softness. Stick to a gentle detergent and cold water for best results.

How should I dry my Squish mallow after washing?

After washing, gently squeeze out excess water and reshape the Squish mallow if necessary. Then, air dry it by laying it flat on a towel or hanging it up. Avoid using a dryer, as it may cause the fabric to shrink or lose its softness.

How often should I wash my Squish mallow?

The frequency of washing your Squish mallow depends on how often it’s used and whether it becomes visibly dirty or smelly. As a general guideline, aim to wash it every few months or as needed to keep it clean and fresh.

Conclusion

Your Squish mallow is more than just a plush toy it’s a beloved companion that deserves the best care. By following these simple washing tips and techniques, you can keep your Squish mallow clean, fresh and ready for endless cuddles.       

Whether you opt for gentle hand washing or a machine cycle, remember to handle your Squish mallow with care and always air dry it to preserve its softness and shape. With a little TLC, your Squish mallow will continue to bring you joy and comfort for years to come. So, don’t hesitate to give your cuddly friend the pampering it deserves and enjoy countless moments of snuggly bliss together.

How to wash baseball cap

How to wash a baseball cap

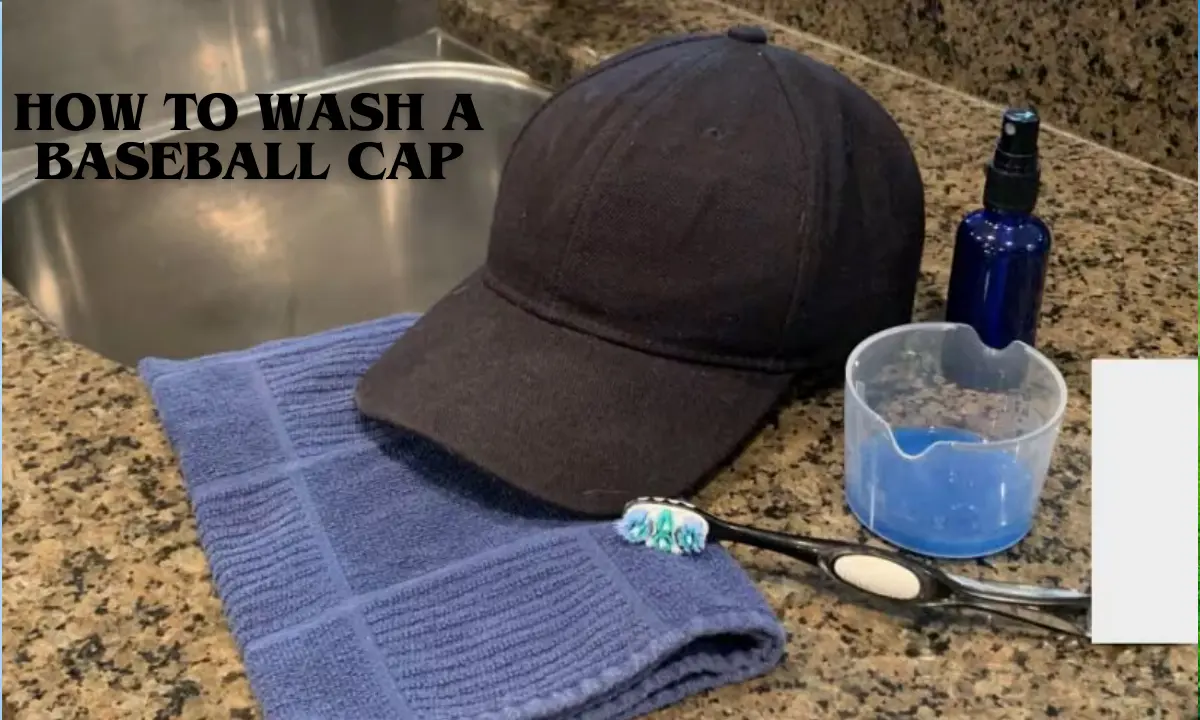
How to wash baseball caps: Your trusty baseball cap has been with you through thick and thin, shading your eyes from the sun and adding a touch of style to your outfit. But as you embark on adventures and conquer the day, your cap inevitably collects dirt, sweat, and grime. Fear not, In this comprehensive guide, we will show you how to wash your beloved baseball cap with care, ensuring it stays fresh and ready for your next adventure.

From vintage snapbacks to classic dad hats, each baseball cap requires special attention when it comes to cleaning. Whether you are dealing with stubborn stains or simply refreshing your favorite cap, we have got you covered. So, grab your cap and let’s dive into the world of hat hygiene like never before.

Learn How to wash baseball caps

1. Assess the Material:

Before diving into cleaning, identify the material of your baseball cap. While most modern caps are made from durable fabrics like cotton or polyester, older caps may have delicate features like cardboard brims. Knowing the material will help you choose the appropriate cleaning method.

2. Spot Treat Stains:

For localized stains, gently dab the affected area with a mild detergent or stain remover. Use a soft-bristled brush or toothbrush to work the cleaner into the fabric. Avoid harsh chemicals that could damage the material, especially if your cap has delicate embroidery or patches.

3. Hand Wash Method:

For delicate caps or those with intricate designs, hand washing is the safest option. Fill a clean sink or basin with lukewarm water and add a small amount of mild detergent. Submerge the cap and gently agitate the water, focusing on areas with stains or buildup.

4. Machine Wash Method:

If your cap is made from sturdy material like cotton or polyester, you can opt for machine washing. Place the cap in a mesh laundry bag to protect it during the wash cycle. Use cold water and a gentle detergent, and avoid washing with heavy or abrasive fabrics.

5. Air Dry:

After washing, reshape the cap to its original form and let it air dry. Avoid using the dryer, as high heat can shrink the fabric and distort the shape of the cap. Instead, lay the cap flat on a towel or hang it on a hat rack to dry naturally.

6. Final Touches:

Once dry, give your baseball cap a final inspection. Use a lint roller to remove any lingering lint or debris, and gently brush the brim to smooth out any wrinkles. Your cap is now clean, fresh, and ready to wear on your next outing.

7. Regular Maintenance:

To keep your baseball cap looking its best, incorporate regular maintenance into your routine. Spot clean stains as soon as they occur and avoid exposing your cap to harsh elements like extreme heat or moisture.

By following these simple steps, you can ensure your beloved baseball cap stays clean and fresh for years to come, allowing you to continue making memories in style.

8. Preserve the Shape:

To maintain the shape of your baseball cap during washing, consider using a cap frame or hat form. These accessories provide support to the cap and help prevent it from losing its structure. Alternatively, you can stuff the cap with a clean towel or crumpled paper to help it retain its shape as it dries.

9. Pay Attention to Embellishments:

If your baseball cap features delicate embellishments like embroidery, patches, or decorative stitching, take extra care when cleaning. Avoid rubbing or scrubbing these areas vigorously to prevent damage. Instead, gently spot clean and pat dry to maintain the integrity of the design.

Washing Baseball Caps

10. Invest in a Hat Cleaning Kit:

For avid cap enthusiasts, investing in a hat cleaning kit can be a game-changer. These kits often include specialized cleaning solutions, brushes, and tools designed specifically for cleaning and maintaining baseball caps. With the right tools at your disposal, keeping your caps in top condition becomes effortless.

11. Consider Dry Cleaning:

If you’re hesitant to wash your baseball cap at home or if it has intricate detailing that requires delicate handling, consider taking it to a professional dry cleaner. Dry cleaning ensures thorough cleaning while minimizing the risk of damage to your cap’s fabric and design elements.

12. Rotate Your Caps:

To prolong the life of your baseball caps and reduce the frequency of washing, consider rotating your caps regularly. By alternating between different caps in your collection, you’ll give each cap time to air out and prevent excessive wear and tear.

13. Store Properly:

When not in use, store your baseball caps in a cool, dry place away from direct sunlight and moisture. Avoid crushing or stacking caps on top of each other, as this can cause them to lose their shape. Instead, use a dedicated hat rack, hooks, or a cap organizer to keep your caps neatly organized and preserved.

14. Know When to Retire:

Despite your best efforts to clean and maintain them, there may come a time when certain baseball caps need to be retired. Signs of irreparable damage, such as frayed fabric, faded colors or persistent odors, indicate that it’s time to bid farewell and make room for new additions to your cap collection.

15. Enjoy Your Freshly Cleaned Caps:

With your baseball caps cleaned, refreshed, and ready to wear, it’s time to hit the streets in style. Whether you are heading to a ballgame, running errands, or simply enjoying the great outdoors, your freshly cleaned caps are sure to turn heads and add a touch of personality to any outfit.

FAQs

Can I wash my baseball cap in the dishwasher?

While some people swear by washing baseball caps in the dishwasher, it’s generally not recommended. The high heat and agitation can damage the fabric and cause the cap to lose its shape. It’s safer to hand wash or use a gentle cycle in the washing machine.

Will washing my baseball cap cause it to shrink?

Washing your baseball cap with cold water and air drying it should not cause significant shrinkage. However, using hot water or placing it in the dryer can lead to shrinkage, especially if the cap is made from materials like cotton. Always follow care instructions to avoid any unwanted changes in size.

How often should I wash my baseball cap?

The frequency of washing depends on how often you wear your baseball cap and the level of dirt or sweat it accumulates. As a general rule, it’s a good idea to wash your cap whenever it starts to look dirty or smell unpleasant. Regular spot cleaning can also help prolong the time between washes.

Can I bleach my baseball cap to remove stains?

Bleach is not recommended for washing baseball caps, as it can cause discoloration and damage to the fabric. Instead, opt for mild detergent or stain removers specifically formulated for the material of your cap. For stubborn stains, consider consulting a professional cleaner for safe and effective removal.

Conclusion

Now that you are equipped with the knowledge and tips to wash your baseball caps with care, there is no stopping you from keeping them looking fresh and ready for action. Whether you prefer hand washing or machine washing, following these steps will ensure your caps stay in top condition for many innings to come.

So, bid farewell to grimy caps and hello to a wardrobe filled with clean, stylish headwear. With a little TLC and attention to detail, your baseball caps will continue to be the perfect accessory for all your adventures, from ballpark outings to everyday errands. Get ready to step out in style and showcase your freshly cleaned caps to the world.

How to Wash Hats

How to Wash a Hat

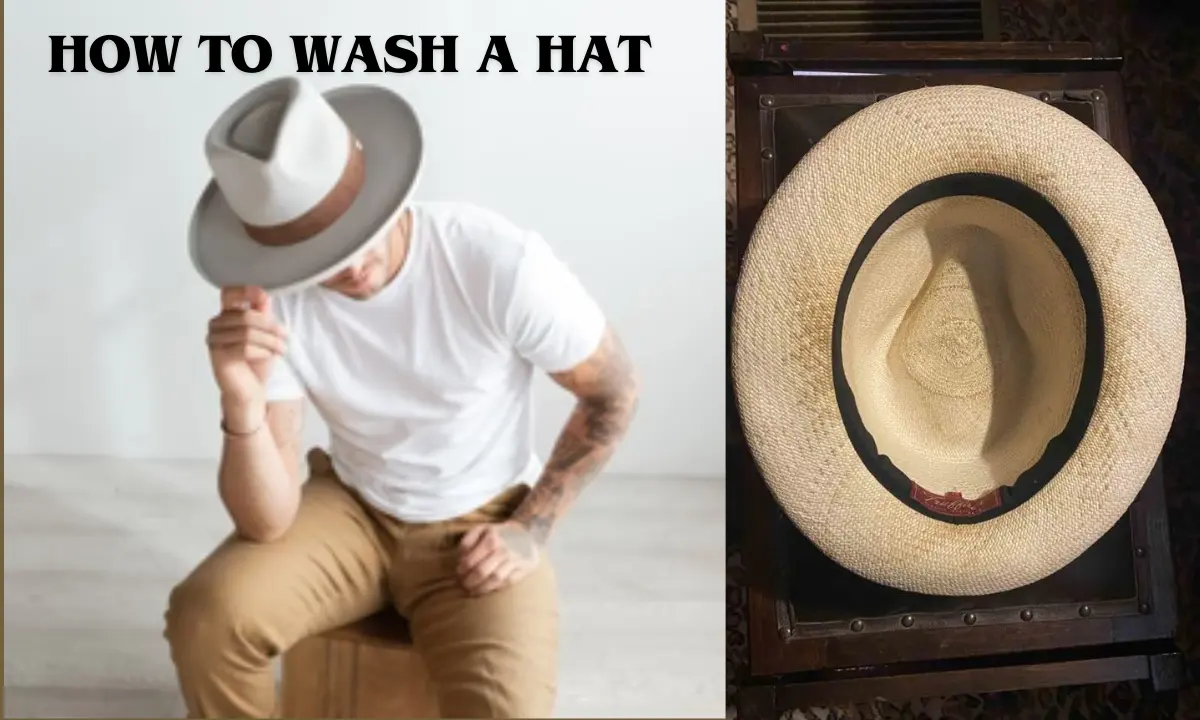
How to Wash Hats: Hats, the unsung heroes of our wardrobes, shield our heads from the sun, keep us warm in chilly weather and effortlessly elevate our style. Yet, despite their indispensability, they often bear the brunt of dirt, sweat, and grime, becoming a breeding ground for odor and bacteria. Whether it’s a beloved baseball cap, a cozy beanie, or a chic fedora, knowing how to properly wash your hat is essential for maintaining its longevity and keeping it looking its best.

How to Wash Hats

Hand-knit wool hats, in particular, present a unique challenge when it comes to cleaning. Their delicate fibers require gentle care to prevent shrinking or distortion. However, fear not, for we’ve compiled the ultimate guide to help you navigate the murky waters of hat washing with ease and finesse. From deciphering material tags to mastering the art of hand washing, we will equip you with all the tools and knowledge you need to revive your hats to their former glory. So, grab your soapy water and let’s dive into the world of hat hygiene like never before.

Method #1: Washing a Hat by Hand

Prepare the Water:

Start by filling a small plastic tub with cold water. Remember, cold water is essential to prevent colors from running and minimize the risk of shrinking, especially for delicate materials like hand-knit wool. You only need enough water to fully submerge the hats.

Choose the Right Cleanser:

Once your tub is filled, add about a teaspoon of mild detergent or soap. Ensure the detergent is suitable for the material of your hat to avoid damage. For wool hats, opt for a soap specially formulated for wool fabric to prevent pilling and discoloration. Avoid using bleach or enzyme treatments on woolens.

Spot Test:

Before fully immersing your hat, perform a spot test. Soak a small patch of the hat for about two minutes and check for any bleeding colors or discoloration. If the test patch looks good, proceed to soak the entire hat.

Soak and Clean:

Once your spot test is successful, immerse the entire hat in the soapy water. Allow it to soak for approximately 30 minutes for a light cleaning or longer for stubborn dirt. Keep an eye on it to ensure the water remains cold.

Rinse Thoroughly:

After soaking, remove the hat from the water and rinse it under a steady stream of cold water to remove all traces of detergent. Continue rinsing until the water runs clear and the hat feels no longer sticky.

Remove Excess Water:

Gently squeeze the hat between your hands to remove excess water, being careful not to wring or twist it, as this could distort its shape. Then, pat the hat dry with a clean towel until it’s no longer dripping.

Air Dry:

Finally, lay the hat flat on a clean towel in a well-ventilated area to air dry. Avoid direct sunlight and heat sources, as they may cause the hat to fade or shrink. Allow the hat to dry completely before wearing or storing it.

Washing a Knit Hat with a Laundry Machine

Use a Laundry Bag:

For delicate knit hats, it’s best to use a laundry bag to protect them during the wash cycle. Place the hat in a pillowcase or washable garment bag to prevent it from getting damaged by the washer’s motion.

Prepare the Load:

If possible, wash your knit hats with a larger load of laundry to prevent them from felting. Ensure the other items in the load are of similar colors to avoid any color bleeding.

Start with Cold Water:

Begin the wash cycle with cold water to protect the delicate fibers of the knit hats. Add a cap of mild detergent or specialty wool detergent if washing wool items.

Let it Soak:

Allow the laundry to soak for at least one hour, or overnight for heavily soiled items. Avoid restarting the washer during this time to prevent agitation.

Spin Only Cycle:

After soaking, run the washer on the “spin-only” cycle to remove excess water from the hats. You may need to run this cycle more than once if the items are still soaking wet.

Air Dry:

Lay the knit hats flat on a clean towel in a well-ventilated area to air dry. Avoid using a clothes dryer, as it may cause the hats to shrink or lose their shape.

Washing a Baseball Cap with a Laundry Machine

Pre-treat the Liner:

Before washing, pre-treat the liner or headband of the baseball cap with an enzyme-based laundry pre-spray to remove sweat and oils.

Wash with Similar Items:

Place the baseball cap in the laundry with similarly colored clothing and use cold water and mild detergent. Avoid using bleach or hot water, as they can damage the cap.

Air Dry:

Once washed, air dry the baseball cap on a flat surface in a well-ventilated area. Avoid using a clothes dryer, as it may cause the cap to shrink or lose its shape.

Washing a Straw Hat

Check Durability:

Ensure the straw hat can be washed by checking the manufacturer’s tag or testing its durability by gently bending the rim. Sturdier types of straw like baku and shantung are suitable for washing.

Remove Decorative Pieces:

If possible, remove any decorative pieces from the hat before cleaning to avoid damage.

Light Cleaning with a Washcloth:

For light cleaning, use a damp washcloth to gently dab away grime from the surface of the hat.

Use Hydrogen Peroxide Solution:

If water alone is not sufficient, use a solution of hydrogen peroxide and water to gently clean the entire hat. Avoid soaking the straw to prevent warping and shrinking.
 Washing Hats

Tips and Tricks for Washing Hats:

Read the Label:

Always check the care label or tag on your hat for specific washing instructions. This will help you determine the best method and avoid any potential damage.

Spot Clean Regularly:

To prevent heavy buildup of dirt and grime, spot clean your hats regularly using a gentle detergent and a soft brush or cloth.

Use Gentle Detergents:

Opt for mild detergents specifically formulated for delicate fabrics like wool or straw. Avoid harsh chemicals, bleach and strong detergents that can damage the material.

Test for Colorfastness:

Before washing your hat, perform a spot test to check for color bleeding. Dampen a small area of the hat and dab it onto a white cloth. If no color transfers, it’s safe to proceed with washing.

Hand Wash for Delicates:

Hand washing is the safest method for delicate hats like hand-knit woolens or straw hats. Use cold water and a gentle detergent to maintain the integrity of the fibers.

Use a Laundry Bag:

When machine washing hats, always place them in a laundry bag or pillowcase to protect them from tangling and agitation. This will help preserve their shape and prevent damage.

Air Dry Flat:

After washing, always air dry your hats flat on a clean towel to maintain their shape and prevent distortion. Avoid hanging hats to dry, as this can cause them to lose their shape.

Avoid Heat:

Never expose hats to direct heat sources like hairdryers or radiators, as heat can cause shrinkage, fading, and damage to delicate materials.

Handle with Care:

When washing and drying hats, handle them gently to avoid stretching or misshaping. Avoid wringing or twisting, and instead, gently squeeze out excess water and pat dry with a towel.

Store Properly:

To prolong the life of your hats, store them in a cool, dry place away from direct sunlight and moisture. Use a hat rack or storage box to help retain their shape and prevent dust buildup.

Conclusion

With these expert tips and tricks at your disposal, washing your hats has never been easier. Whether you are tackling a cozy knit beanie, a stylish baseball cap or a delicate straw hat, proper care and maintenance are key to preserving their longevity and keeping them looking their best.

Remember to always check the care label, spot test for colorfastness, and use gentle detergents to ensure your hats remain in pristine condition. Whether hand washing or machine washing, handle your hats with care, and always air dry them flat to maintain their shape and integrity.

So, say goodbye to grimy hats and hello to fresh, clean headwear that’s ready to accompany you on all your adventures. With a little TLC, your hats will continue to be the perfect finishing touch to any outfit, rain or shine.


How to wash dress shirts

How to wash dress shirts

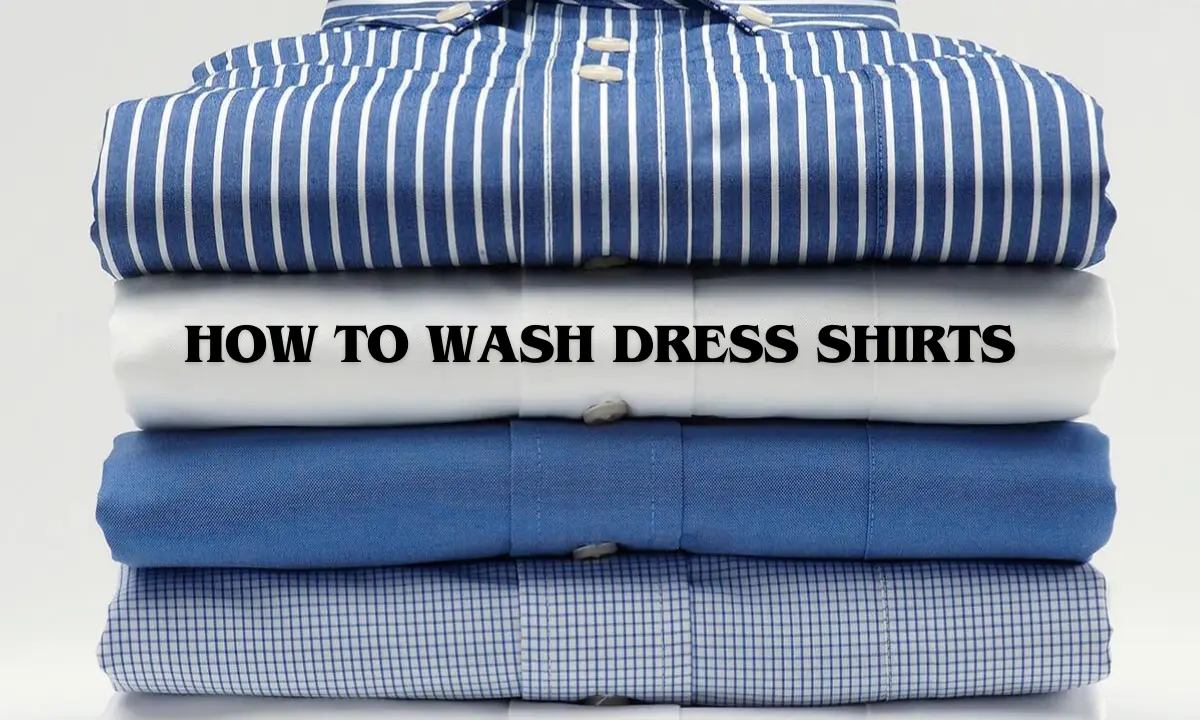
How to wash dress shirts: the cornerstone of a sharp wardrobe, the epitome of sophistication and often, the canvas for many a mishap. We have all been there the dreaded wine spill, the stubborn stain that just won’t budge or the crumpled mess that was once your perfectly pressed shirt. But fear not because today, we are exploring into the art of washing dress shirts.

Whether you are a staunch believer in the power of the dry cleaner or prefer to take matters into your own hands at home, we have got you covered with expert tips and techniques to keep your dress shirts looking pristine.

Method 1: Washing Dress Shirts and press at the cleaners

When it comes to convenience, it’s hard to beat the trusty cleaners. The wash-and-press method is the go-to for many, offering a quick and easy solution to keeping dress shirts looking sharp. At just a few bucks per shirt, this option may seem like a no-brainer. However, be wary of potential pitfalls some cleaners may be a little too heavy-handed with their presses, leading to chipped buttons and stretched fabric. Additionally, the journey from cleaners to closet can leave collars in a less-than-ideal state, requiring extra ironing to restore them to their former glory.

Method 2: Wash the shirt yourself at home

For those who prefer a hands-on approach, washing dress shirts at home provides a sense of control over the cleaning process. Start by prepping the shirt, unbuttoning all buttons and pre-treating any stains with care. When it comes to washing, opt for the delicate cycle to minimize wear, and be sure to use a high-quality detergent suited to the shirt’s color.

Once washed, promptly remove the shirts to prevent intense wrinkles from setting in, and follow the care instructions for drying. Finally, iron the shirts to perfection, ensuring they are ready to impress at any occasion.

Method 3: “Dry clean” at the cleaners

While dry cleaning may seem like a foolproof option, it’s not without its drawbacks. While it can effectively remove oil-based stains and minimize shrinkage, it may not always tackle water-soluble dirt or stains and the cost can add up. Plus, entrusting your shirts to a cleaner‘s care can be a gamble, with the potential for less-than-gentle treatment.

washing dress shirts

Tips and Tricks for Washing Dress Shirts Like a Pro:

Pre-treat Stains Promptly:

Don’t let stains set in! As soon as you notice a spot on your dress shirt, tackle it with a stain remover or gentle detergent to prevent it from becoming a permanent fixture.

Unbutton and Prep:

Before washing, ensure all buttons, including collar and cuff buttons, are unfastened. Remove collar stays and any accessories to prevent damage and ensure a thorough clean.

Choose the Right Cycle:

Opt for the delicate cycle on your washing machine to minimize wear and tear on your dress shirts. For heavily soiled or sturdier fabrics, the normal cycle may be suitable, but always err on the side of caution.

Use Quality Detergent:

Invest in a high-quality detergent that’s appropriate for the color and fabric of your dress shirts. Avoid chlorine-based cleaners, as they can cause discoloration and damage to delicate fabrics.

Handle with Care:

When removing shirts from the washing machine, avoid wringing or twisting them excessively. Instead, gently shake out any wrinkles before hanging or laying them flat to dry.

Iron with Precision:

Iron shirts while they’re still slightly damp to ease out wrinkles more effectively. Use a suitable ironing temperature for the fabric and take care around buttons and seams to avoid damage.

Air Dry Whenever Possible:

Whenever feasible, air-dry your dress shirts to preserve their shape and prevent shrinkage. Hang them on quality hangers or lay them flat to dry, avoiding direct sunlight to prevent fading.

Store Properly:

Once clean and pressed, store your dress shirts in a cool, dry place, ideally on hangers to maintain their shape. Avoid overcrowding in your closet to prevent wrinkles and creases.

Address Collar Stains:

Collars are prone to collecting sweat and oils, leading to discoloration over time. Spot-clean collars regularly or treat them with a pre-wash solution before laundering to keep them looking fresh.

Know When to Seek Professional Help:

For stubborn stains or delicate fabrics, don’t hesitate to seek the expertise of a professional cleaner. They have the tools and knowledge to tackle tough stains and preserve the integrity of your dress shirts.

FAQs

Is it OK to dry shirts in the dryer?

We generally recommend air-drying shirts to avoid shrinkage and preserve fabric quality. If using a dryer, opt for low heat and remove promptly to minimize wrinkles.

How to remove a stain from a white shirt?

Act fast! Brush away any excess and treat with water or stain remover immediately. Avoid excessive pressure when dabbing solvents to prevent further staining.

Should I use starch when a shirt is pressed?

While starch can enhance crispness, it may lead to premature wear and tear. Consider alternatives to preserve shirt quality.

How can I maximize dress shirt life?

Keep whites clean promptly, remove collar stays before washing and communicate any stains to your cleaner for spot treatment.

Conclusion

Whether you prefer the convenience of the cleaners or the hands-on approach of home washing, mastering the art of washing dress shirts is essential for maintaining a polished appearance. By following these tips and techniques, you can ensure your shirts stay looking sharp and ready to take on whatever the day throws their way. So go ahead, tackle those stains with confidence and step out in style knowing your dress shirts are in pristine condition.