G-NK1NZZ9XJG

How to wash baseball cap

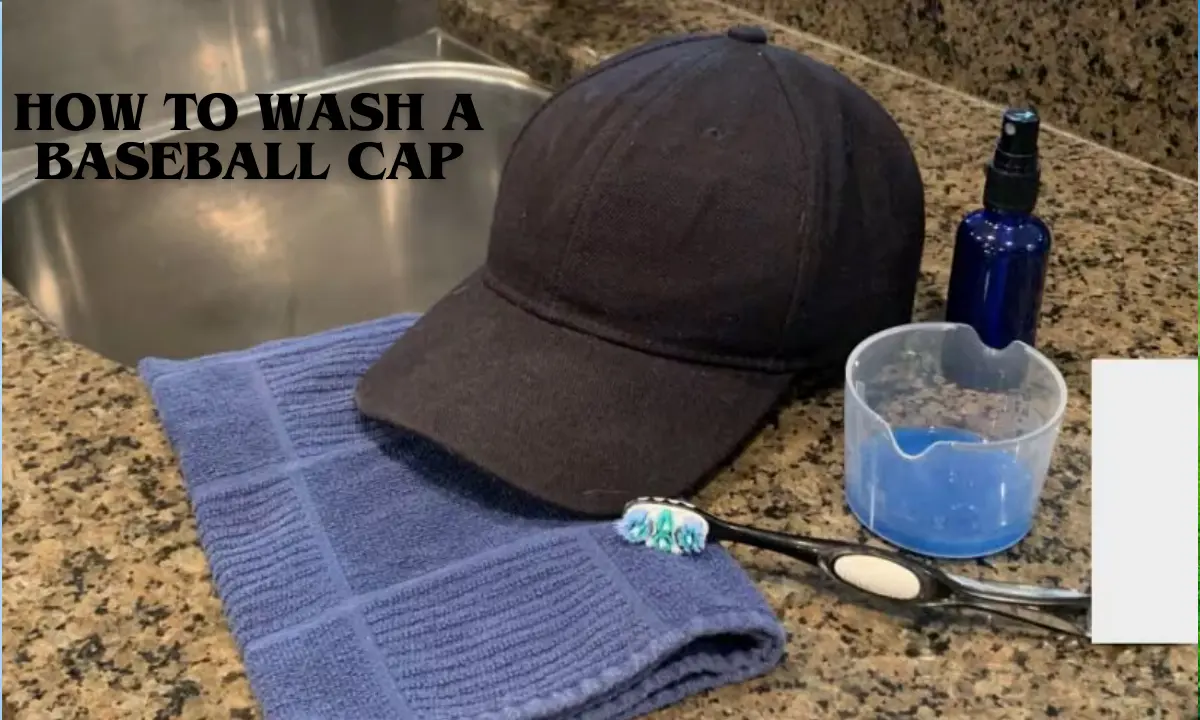
How to wash a baseball cap

How to wash baseball caps: Your trusty baseball cap has been with you through thick and thin, shading your eyes from the sun and adding a touch of style to your outfit. But as you embark on adventures and conquer the day, your cap inevitably collects dirt, sweat, and grime. Fear not, In this comprehensive guide, we will show you how to wash your beloved baseball cap with care, ensuring it stays fresh and ready for your next adventure.

From vintage snapbacks to classic dad hats, each baseball cap requires special attention when it comes to cleaning. Whether you are dealing with stubborn stains or simply refreshing your favorite cap, we have got you covered. So, grab your cap and let’s dive into the world of hat hygiene like never before.

Learn How to wash baseball caps

1. Assess the Material:

Before diving into cleaning, identify the material of your baseball cap. While most modern caps are made from durable fabrics like cotton or polyester, older caps may have delicate features like cardboard brims. Knowing the material will help you choose the appropriate cleaning method.

2. Spot Treat Stains:

For localized stains, gently dab the affected area with a mild detergent or stain remover. Use a soft-bristled brush or toothbrush to work the cleaner into the fabric. Avoid harsh chemicals that could damage the material, especially if your cap has delicate embroidery or patches.

3. Hand Wash Method:

For delicate caps or those with intricate designs, hand washing is the safest option. Fill a clean sink or basin with lukewarm water and add a small amount of mild detergent. Submerge the cap and gently agitate the water, focusing on areas with stains or buildup.

4. Machine Wash Method:

If your cap is made from sturdy material like cotton or polyester, you can opt for machine washing. Place the cap in a mesh laundry bag to protect it during the wash cycle. Use cold water and a gentle detergent, and avoid washing with heavy or abrasive fabrics.

5. Air Dry:

After washing, reshape the cap to its original form and let it air dry. Avoid using the dryer, as high heat can shrink the fabric and distort the shape of the cap. Instead, lay the cap flat on a towel or hang it on a hat rack to dry naturally.

6. Final Touches:

Once dry, give your baseball cap a final inspection. Use a lint roller to remove any lingering lint or debris, and gently brush the brim to smooth out any wrinkles. Your cap is now clean, fresh, and ready to wear on your next outing.

7. Regular Maintenance:

To keep your baseball cap looking its best, incorporate regular maintenance into your routine. Spot clean stains as soon as they occur and avoid exposing your cap to harsh elements like extreme heat or moisture.

By following these simple steps, you can ensure your beloved baseball cap stays clean and fresh for years to come, allowing you to continue making memories in style.

8. Preserve the Shape:

To maintain the shape of your baseball cap during washing, consider using a cap frame or hat form. These accessories provide support to the cap and help prevent it from losing its structure. Alternatively, you can stuff the cap with a clean towel or crumpled paper to help it retain its shape as it dries.

9. Pay Attention to Embellishments:

If your baseball cap features delicate embellishments like embroidery, patches, or decorative stitching, take extra care when cleaning. Avoid rubbing or scrubbing these areas vigorously to prevent damage. Instead, gently spot clean and pat dry to maintain the integrity of the design.

Washing Baseball Caps

10. Invest in a Hat Cleaning Kit:

For avid cap enthusiasts, investing in a hat cleaning kit can be a game-changer. These kits often include specialized cleaning solutions, brushes, and tools designed specifically for cleaning and maintaining baseball caps. With the right tools at your disposal, keeping your caps in top condition becomes effortless.

11. Consider Dry Cleaning:

If you’re hesitant to wash your baseball cap at home or if it has intricate detailing that requires delicate handling, consider taking it to a professional dry cleaner. Dry cleaning ensures thorough cleaning while minimizing the risk of damage to your cap’s fabric and design elements.

12. Rotate Your Caps:

To prolong the life of your baseball caps and reduce the frequency of washing, consider rotating your caps regularly. By alternating between different caps in your collection, you’ll give each cap time to air out and prevent excessive wear and tear.

13. Store Properly:

When not in use, store your baseball caps in a cool, dry place away from direct sunlight and moisture. Avoid crushing or stacking caps on top of each other, as this can cause them to lose their shape. Instead, use a dedicated hat rack, hooks, or a cap organizer to keep your caps neatly organized and preserved.

14. Know When to Retire:

Despite your best efforts to clean and maintain them, there may come a time when certain baseball caps need to be retired. Signs of irreparable damage, such as frayed fabric, faded colors or persistent odors, indicate that it’s time to bid farewell and make room for new additions to your cap collection.

15. Enjoy Your Freshly Cleaned Caps:

With your baseball caps cleaned, refreshed, and ready to wear, it’s time to hit the streets in style. Whether you are heading to a ballgame, running errands, or simply enjoying the great outdoors, your freshly cleaned caps are sure to turn heads and add a touch of personality to any outfit.

FAQs

Can I wash my baseball cap in the dishwasher?

While some people swear by washing baseball caps in the dishwasher, it’s generally not recommended. The high heat and agitation can damage the fabric and cause the cap to lose its shape. It’s safer to hand wash or use a gentle cycle in the washing machine.

Will washing my baseball cap cause it to shrink?

Washing your baseball cap with cold water and air drying it should not cause significant shrinkage. However, using hot water or placing it in the dryer can lead to shrinkage, especially if the cap is made from materials like cotton. Always follow care instructions to avoid any unwanted changes in size.

How often should I wash my baseball cap?

The frequency of washing depends on how often you wear your baseball cap and the level of dirt or sweat it accumulates. As a general rule, it’s a good idea to wash your cap whenever it starts to look dirty or smell unpleasant. Regular spot cleaning can also help prolong the time between washes.

Can I bleach my baseball cap to remove stains?

Bleach is not recommended for washing baseball caps, as it can cause discoloration and damage to the fabric. Instead, opt for mild detergent or stain removers specifically formulated for the material of your cap. For stubborn stains, consider consulting a professional cleaner for safe and effective removal.

Conclusion

Now that you are equipped with the knowledge and tips to wash your baseball caps with care, there is no stopping you from keeping them looking fresh and ready for action. Whether you prefer hand washing or machine washing, following these steps will ensure your caps stay in top condition for many innings to come.

So, bid farewell to grimy caps and hello to a wardrobe filled with clean, stylish headwear. With a little TLC and attention to detail, your baseball caps will continue to be the perfect accessory for all your adventures, from ballpark outings to everyday errands. Get ready to step out in style and showcase your freshly cleaned caps to the world.

How to Wash Hats

How to Wash a Hat

How to Wash Hats: Hats, the unsung heroes of our wardrobes, shield our heads from the sun, keep us warm in chilly weather and effortlessly elevate our style. Yet, despite their indispensability, they often bear the brunt of dirt, sweat, and grime, becoming a breeding ground for odor and bacteria. Whether it’s a beloved baseball cap, a cozy beanie, or a chic fedora, knowing how to properly wash your hat is essential for maintaining its longevity and keeping it looking its best.

How to Wash Hats

Hand-knit wool hats, in particular, present a unique challenge when it comes to cleaning. Their delicate fibers require gentle care to prevent shrinking or distortion. However, fear not, for we’ve compiled the ultimate guide to help you navigate the murky waters of hat washing with ease and finesse. From deciphering material tags to mastering the art of hand washing, we will equip you with all the tools and knowledge you need to revive your hats to their former glory. So, grab your soapy water and let’s dive into the world of hat hygiene like never before.

Method #1: Washing a Hat by Hand

Prepare the Water:

Start by filling a small plastic tub with cold water. Remember, cold water is essential to prevent colors from running and minimize the risk of shrinking, especially for delicate materials like hand-knit wool. You only need enough water to fully submerge the hats.

Choose the Right Cleanser:

Once your tub is filled, add about a teaspoon of mild detergent or soap. Ensure the detergent is suitable for the material of your hat to avoid damage. For wool hats, opt for a soap specially formulated for wool fabric to prevent pilling and discoloration. Avoid using bleach or enzyme treatments on woolens.

Spot Test:

Before fully immersing your hat, perform a spot test. Soak a small patch of the hat for about two minutes and check for any bleeding colors or discoloration. If the test patch looks good, proceed to soak the entire hat.

Soak and Clean:

Once your spot test is successful, immerse the entire hat in the soapy water. Allow it to soak for approximately 30 minutes for a light cleaning or longer for stubborn dirt. Keep an eye on it to ensure the water remains cold.

Rinse Thoroughly:

After soaking, remove the hat from the water and rinse it under a steady stream of cold water to remove all traces of detergent. Continue rinsing until the water runs clear and the hat feels no longer sticky.

Remove Excess Water:

Gently squeeze the hat between your hands to remove excess water, being careful not to wring or twist it, as this could distort its shape. Then, pat the hat dry with a clean towel until it’s no longer dripping.

Air Dry:

Finally, lay the hat flat on a clean towel in a well-ventilated area to air dry. Avoid direct sunlight and heat sources, as they may cause the hat to fade or shrink. Allow the hat to dry completely before wearing or storing it.

Washing a Knit Hat with a Laundry Machine

Use a Laundry Bag:

For delicate knit hats, it’s best to use a laundry bag to protect them during the wash cycle. Place the hat in a pillowcase or washable garment bag to prevent it from getting damaged by the washer’s motion.

Prepare the Load:

If possible, wash your knit hats with a larger load of laundry to prevent them from felting. Ensure the other items in the load are of similar colors to avoid any color bleeding.

Start with Cold Water:

Begin the wash cycle with cold water to protect the delicate fibers of the knit hats. Add a cap of mild detergent or specialty wool detergent if washing wool items.

Let it Soak:

Allow the laundry to soak for at least one hour, or overnight for heavily soiled items. Avoid restarting the washer during this time to prevent agitation.

Spin Only Cycle:

After soaking, run the washer on the “spin-only” cycle to remove excess water from the hats. You may need to run this cycle more than once if the items are still soaking wet.

Air Dry:

Lay the knit hats flat on a clean towel in a well-ventilated area to air dry. Avoid using a clothes dryer, as it may cause the hats to shrink or lose their shape.

Washing a Baseball Cap with a Laundry Machine

Pre-treat the Liner:

Before washing, pre-treat the liner or headband of the baseball cap with an enzyme-based laundry pre-spray to remove sweat and oils.

Wash with Similar Items:

Place the baseball cap in the laundry with similarly colored clothing and use cold water and mild detergent. Avoid using bleach or hot water, as they can damage the cap.

Air Dry:

Once washed, air dry the baseball cap on a flat surface in a well-ventilated area. Avoid using a clothes dryer, as it may cause the cap to shrink or lose its shape.

Washing a Straw Hat

Check Durability:

Ensure the straw hat can be washed by checking the manufacturer’s tag or testing its durability by gently bending the rim. Sturdier types of straw like baku and shantung are suitable for washing.

Remove Decorative Pieces:

If possible, remove any decorative pieces from the hat before cleaning to avoid damage.

Light Cleaning with a Washcloth:

For light cleaning, use a damp washcloth to gently dab away grime from the surface of the hat.

Use Hydrogen Peroxide Solution:

If water alone is not sufficient, use a solution of hydrogen peroxide and water to gently clean the entire hat. Avoid soaking the straw to prevent warping and shrinking.

 Washing Hats

Tips and Tricks for Washing Hats:

Read the Label:

Always check the care label or tag on your hat for specific washing instructions. This will help you determine the best method and avoid any potential damage.

Spot Clean Regularly:

To prevent heavy buildup of dirt and grime, spot clean your hats regularly using a gentle detergent and a soft brush or cloth.

Use Gentle Detergents:

Opt for mild detergents specifically formulated for delicate fabrics like wool or straw. Avoid harsh chemicals, bleach and strong detergents that can damage the material.

Test for Colorfastness:

Before washing your hat, perform a spot test to check for color bleeding. Dampen a small area of the hat and dab it onto a white cloth. If no color transfers, it’s safe to proceed with washing.

Hand Wash for Delicates:

Hand washing is the safest method for delicate hats like hand-knit woolens or straw hats. Use cold water and a gentle detergent to maintain the integrity of the fibers.

Use a Laundry Bag:

When machine washing hats, always place them in a laundry bag or pillowcase to protect them from tangling and agitation. This will help preserve their shape and prevent damage.

Air Dry Flat:

After washing, always air dry your hats flat on a clean towel to maintain their shape and prevent distortion. Avoid hanging hats to dry, as this can cause them to lose their shape.

Avoid Heat:

Never expose hats to direct heat sources like hairdryers or radiators, as heat can cause shrinkage, fading, and damage to delicate materials.

Handle with Care:

When washing and drying hats, handle them gently to avoid stretching or misshaping. Avoid wringing or twisting, and instead, gently squeeze out excess water and pat dry with a towel.

Store Properly:

To prolong the life of your hats, store them in a cool, dry place away from direct sunlight and moisture. Use a hat rack or storage box to help retain their shape and prevent dust buildup.

Conclusion

With these expert tips and tricks at your disposal, washing your hats has never been easier. Whether you are tackling a cozy knit beanie, a stylish baseball cap or a delicate straw hat, proper care and maintenance are key to preserving their longevity and keeping them looking their best.

Remember to always check the care label, spot test for colorfastness, and use gentle detergents to ensure your hats remain in pristine condition. Whether hand washing or machine washing, handle your hats with care, and always air dry them flat to maintain their shape and integrity.

So, say goodbye to grimy hats and hello to fresh, clean headwear that’s ready to accompany you on all your adventures. With a little TLC, your hats will continue to be the perfect finishing touch to any outfit, rain or shine.


How to wash dress shirts

How to wash dress shirts

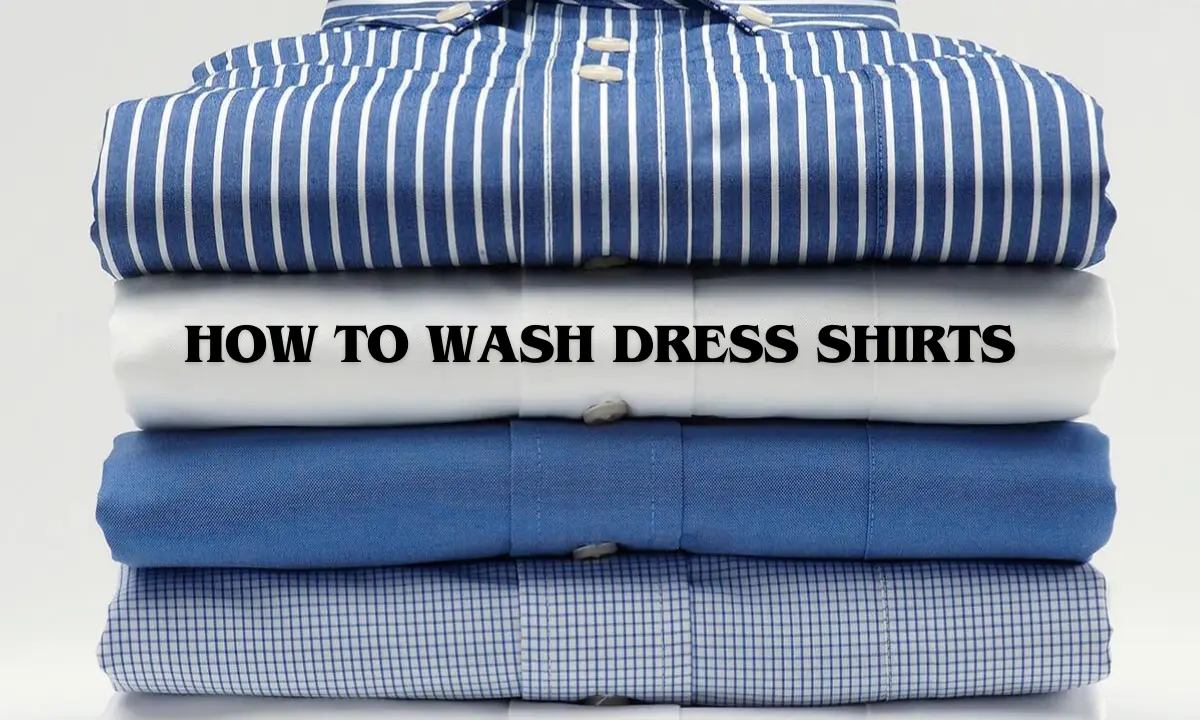
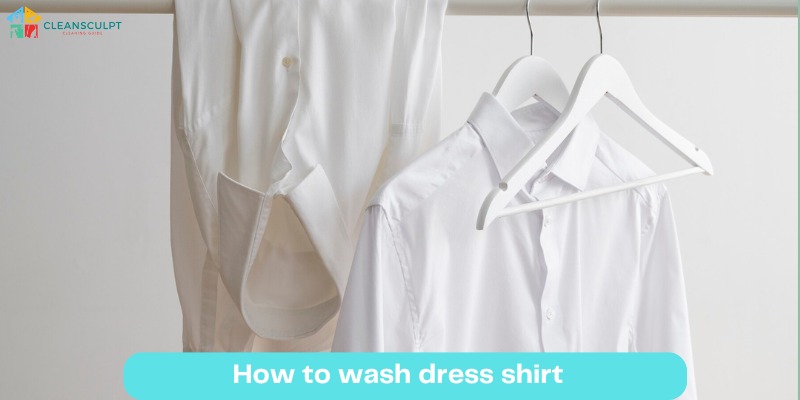
How to wash dress shirts: the cornerstone of a sharp wardrobe, the epitome of sophistication and often, the canvas for many a mishap. We have all been there the dreaded wine spill, the stubborn stain that just won’t budge or the crumpled mess that was once your perfectly pressed shirt. But fear not because today, we are exploring into the art of washing dress shirts.

Whether you are a staunch believer in the power of the dry cleaner or prefer to take matters into your own hands at home, we have got you covered with expert tips and techniques to keep your dress shirts looking pristine.

Method 1: Washing Dress Shirts and press at the cleaners

When it comes to convenience, it’s hard to beat the trusty cleaners. The wash-and-press method is the go-to for many, offering a quick and easy solution to keeping dress shirts looking sharp. At just a few bucks per shirt, this option may seem like a no-brainer. However, be wary of potential pitfalls some cleaners may be a little too heavy-handed with their presses, leading to chipped buttons and stretched fabric. Additionally, the journey from cleaners to closet can leave collars in a less-than-ideal state, requiring extra ironing to restore them to their former glory.

Method 2: Wash the shirt yourself at home

For those who prefer a hands-on approach, washing dress shirts at home provides a sense of control over the cleaning process. Start by prepping the shirt, unbuttoning all buttons and pre-treating any stains with care. When it comes to washing, opt for the delicate cycle to minimize wear, and be sure to use a high-quality detergent suited to the shirt’s color.

Once washed, promptly remove the shirts to prevent intense wrinkles from setting in, and follow the care instructions for drying. Finally, iron the shirts to perfection, ensuring they are ready to impress at any occasion.

Method 3: “Dry clean” at the cleaners

While dry cleaning may seem like a foolproof option, it’s not without its drawbacks. While it can effectively remove oil-based stains and minimize shrinkage, it may not always tackle water-soluble dirt or stains and the cost can add up. Plus, entrusting your shirts to a cleaner‘s care can be a gamble, with the potential for less-than-gentle treatment.

washing dress shirts

Tips and Tricks for Washing Dress Shirts Like a Pro:

Pre-treat Stains Promptly:

Don’t let stains set in! As soon as you notice a spot on your dress shirt, tackle it with a stain remover or gentle detergent to prevent it from becoming a permanent fixture.

Unbutton and Prep:

Before washing, ensure all buttons, including collar and cuff buttons, are unfastened. Remove collar stays and any accessories to prevent damage and ensure a thorough clean.

Choose the Right Cycle:

Opt for the delicate cycle on your washing machine to minimize wear and tear on your dress shirts. For heavily soiled or sturdier fabrics, the normal cycle may be suitable, but always err on the side of caution.

Use Quality Detergent:

Invest in a high-quality detergent that’s appropriate for the color and fabric of your dress shirts. Avoid chlorine-based cleaners, as they can cause discoloration and damage to delicate fabrics.

Handle with Care:

When removing shirts from the washing machine, avoid wringing or twisting them excessively. Instead, gently shake out any wrinkles before hanging or laying them flat to dry.

Iron with Precision:

Iron shirts while they’re still slightly damp to ease out wrinkles more effectively. Use a suitable ironing temperature for the fabric and take care around buttons and seams to avoid damage.

Air Dry Whenever Possible:

Whenever feasible, air-dry your dress shirts to preserve their shape and prevent shrinkage. Hang them on quality hangers or lay them flat to dry, avoiding direct sunlight to prevent fading.

Store Properly:

Once clean and pressed, store your dress shirts in a cool, dry place, ideally on hangers to maintain their shape. Avoid overcrowding in your closet to prevent wrinkles and creases.

Address Collar Stains:

Collars are prone to collecting sweat and oils, leading to discoloration over time. Spot-clean collars regularly or treat them with a pre-wash solution before laundering to keep them looking fresh.

Know When to Seek Professional Help:

For stubborn stains or delicate fabrics, don’t hesitate to seek the expertise of a professional cleaner. They have the tools and knowledge to tackle tough stains and preserve the integrity of your dress shirts.

FAQs

Is it OK to dry shirts in the dryer?

We generally recommend air-drying shirts to avoid shrinkage and preserve fabric quality. If using a dryer, opt for low heat and remove promptly to minimize wrinkles.

How to remove a stain from a white shirt?

Act fast! Brush away any excess and treat with water or stain remover immediately. Avoid excessive pressure when dabbing solvents to prevent further staining.

Should I use starch when a shirt is pressed?

While starch can enhance crispness, it may lead to premature wear and tear. Consider alternatives to preserve shirt quality.

How can I maximize dress shirt life?

Keep whites clean promptly, remove collar stays before washing and communicate any stains to your cleaner for spot treatment.

Conclusion

Whether you prefer the convenience of the cleaners or the hands-on approach of home washing, mastering the art of washing dress shirts is essential for maintaining a polished appearance. By following these tips and techniques, you can ensure your shirts stay looking sharp and ready to take on whatever the day throws their way. So go ahead, tackle those stains with confidence and step out in style knowing your dress shirts are in pristine condition.

How to Clean Chainsaw?

How to Clean Chainsaw?

How to Clean Chainsaw: Chainsaws are powerful tools that require regular maintenance to keep them running smoothly and efficiently. In this guide, we’ll walk you through the essential steps of cleaning your chainsaw, incorporating best practices and expert tips to ensure your equipment remains in top condition.

The Importance of Chainsaw Maintenance

Regular cleaning and maintenance of your chainsaw are crucial for several reasons. It ensures the longevity of your equipment, improves efficiency, and reduces the risk of accidents due to malfunctioning parts. This guide will cover all aspects of how to clean chainsaw, including the basics and more detailed procedures.

Preparation: Safety First!

Before starting the cleaning process, ensure your safety by:

  1. Turning off the chainsaw
  2. Removing the spark plug
  3. Gathering necessary tools and safety gear

Step-by-Step Chainsaw Cleaning

Cleaning the Chainsaw Bar and Chain
  1. Remove the Chain and Bar: Carefully detach the chain and bar from the chainsaw.
  2. Clean the Chain: Soak the chain in a cleaning solution, scrub with a brush, and then dry it thoroughly.
  3. Inspect and Clean the Bar: Check the bar for wear and clean the groove using a bar cleaning tool.
Air Filter Maintenance
  • Access the Air Filter: Open the compartment and remove the air filter.
  • Clean or Replace: Depending on the condition, clean the filter with mild soap and water or replace it if it’s beyond repair.
Cleaning the Chainsaw Body
  • Wipe Down the Body: Using a damp cloth, clean the body of the chainsaw to remove any dirt or debris.
Lubrication: Essential for Smooth Operation
  • Apply Oil: Properly lubricate the chain and bar with appropriate chainsaw oil to ensure smooth operation and prevent rust.

Table: Routine Chainsaw Maintenance Checklist

Maintenance Task

Frequency

Tools Required

Clean the chain

After every use

Brush, cleaner

Check and clean the bar

Monthly

Bar cleaning tool

Inspect the air filter

Monthly

None

Lubricate chain and bar

Before every use

Chainsaw oil

Advanced Tips for Chainsaw Maintenance

Chainsaw Maintenance Tutorial

Following a regular maintenance schedule is key to the longevity of your chainsaw. This includes checking all mechanical parts for wear and tear, ensuring the tightness of all nuts and bolts, and storing the chainsaw in a clean, dry place.

Preventive Maintenance for Chainsaws

Preventive maintenance not only extends the lifespan of your chainsaw but also ensures it’s always ready for use. Regular checks and balances can prevent major repairs and maintain optimal performance.

Conclusion: Keeping Your Chainsaw in Prime Condition

By following these simple yet effective cleaning and maintenance steps, you can significantly extend the life of your chainsaw and maintain its efficiency. Remember, a well-maintained chainsaw is a safer, more reliable tool.

Visit our website, Clean Sculpt, for more useful cleaning tips and guides. Whether you’re a professional or a DIY enthusiast, our resources can help you keep your spaces and tools pristine and well-maintained.

FAQs About Chainsaw Maintenance

  1. What is the best way to clean a chainsaw chain?

The best way to clean a chainsaw chain is by removing it from the chainsaw, soaking it in a cleaning solution, scrubbing with a brush, and then drying it completely.

  1. How often should I clean my chainsaw?

 Cleaning your chainsaw after every use is ideal. This prevents buildup and ensures the chainsaw operates efficiently.

  1. Can I perform chainsaw maintenance myself?

Yes, basic chainsaw maintenance, such as cleaning and basic inspections, can be performed by the user. More complex repairs may require professional help.

  1. What tools do I need for chainsaw maintenance?

Essential tools include a cleaning brush, bar cleaning tool, and proper lubricants. Occasionally, you might need a screwdriver or wrench for adjustments.

  1. How do I maintain the chainsaw’s air filter?

 Check and clean the air filter regularly. Wash it with soap and water if it’s reusable, or replace it if it’s disposable.

  1. What are some preventive maintenance tips for chainsaws?

 Regularly check all parts for wear, ensure nuts and bolts are tight, and always lubricate the chain and bar before use

Sweet Home Sanitation Guide

Sweet Home Sanitation

Sweet home sanitation isn’t just about tidying up; it’s the secret to a healthier, happier lifestyle. With the right cleaning tips, you’ll enjoy a clean and welcoming living space, free of germs and allergens. This guide will help you achieve optimal home sanitation while keeping your routine simple and efficient. Let’s explore how to turn your home into a pristine haven.

Why Sweet Home Sanitation Matters


Maintaining proper sweet home sanitation provides a hygienic, comfortable environment where you and your family can thrive. By adhering to cleaning strategies that target every nook and cranny, you can prevent the buildup of dirt, bacteria, and allergens, leading to:

  • Improved health and reduced illness
  • Enhanced comfort and relaxation
  • A more welcoming space for guests

Incorporating these tips into your routine will make sweet home sanitation attainable and manageable.

Kitchen Sanitation

  • Disinfect High-Touch Surfaces: Wipe down countertops, handles, and appliances with a disinfectant.
  • Deep Clean Appliances: Scrub your oven, fridge, and microwave regularly.
  • Garbage Disposal Maintenance: Deodorize and sanitize with a mixture of ice cubes and lemon peels.

Bathroom Sanitation

  • Clean Shower and Tub: Tackle soap scum with a vinegar-based solution.
  • Disinfect Toilets: Use bleach or specialized cleaners to sanitize all parts of the toilet.
  • Wipe Down Surfaces: Sanitize faucets, handles, and other high-touch surfaces.

Living Areas and Bedrooms

  • Vacuum Regularly: Dust and vacuum carpets, upholstery, and drapes.
  • Launder Linens: Wash bedding and blankets to keep them fresh.
  • Dust Thoroughly: Dust surfaces and electronics to reduce allergens.

Table: Home Cleaning Frequency Recommendations

Area

Cleaning Task

Frequency

Kitchen

Wipe countertops

Daily


Deep clean appliances

Weekly to monthly

Bathroom

Disinfect toilet

Weekly


Scrub shower/tub

Weekly

Living Room

Dust and vacuum

Weekly

Bedroom

Launder bedding

Biweekly


Dust surfaces

Weekly

Sweet Home Sanitation Checklist


To keep your home consistently clean, follow this checklist:

Daily:
    • Wipe down kitchen counters and high-touch surfaces.
    • Put away items that don’t belong.
Weekly:
      • Vacuum floors and clean bathroom fixtures.
      • Launder bedding and dust surfaces.
Monthly:
        • Deep clean kitchen appliances.
        • Wash windows and sanitize doorknobs.

SWEET HOME SANITATION tips

The Role of Air Duct Cleaning in Sweet Home Sanitation


Air duct cleaning is often overlooked but is vital for sweet home sanitation. Dust and allergens accumulate in ducts, affecting air quality. Professional cleaning ensures pollutants are removed, improving airflow and creating a healthier home environment.

Promoting Sweet Home Sanitation in Every Season


Cleaning routines should adapt with the seasons to maintain consistent sweet home sanitation. In the spring, focus on deep cleaning windows and decluttering. In the summer, prioritize outdoor spaces and sanitize surfaces often. Fall is ideal for cleaning gutters and prepping for winter, while winter calls for reducing dust accumulation and washing floors regularly.

FAQs

  1. How often should I deep clean my kitchen appliances?

    Deep clean your kitchen appliances every one to three months, depending on usage. Frequently used appliances like microwaves and refrigerators may need monthly cleaning, while ovens and dishwashers can be deep cleaned quarterly to prevent grease and residue buildup.
  2. What’s the best way to sanitize my bathroom?

    Sanitize your bathroom weekly by disinfecting high-touch surfaces such as faucets and toilet handles. Use specialized cleaners for the toilet and a vinegar solution for the shower and tub. This routine helps eliminate bacteria and prevents mold growth.
  3. How often should air ducts be cleaned for home sanitation?

    Professional air duct cleaning is recommended every two to three years. However, if you notice excessive dust buildup or increased allergy symptoms, consider cleaning them sooner. This process helps remove pollutants and allergens that can impact indoor air quality.
  4. How can I make my cleaning routine more efficient?

    Simplify your routine by following a consistent schedule. Focus on high-priority areas daily, like kitchen counters and bathroom surfaces, while saving less-used areas for weekly or monthly cleaning. Investing in quality cleaning tools can also reduce time and effort.
  5. What’s the best way to prevent mold and mildew in my home?

    Regularly ventilate damp areas, like bathrooms and kitchens, to reduce moisture buildup. Use dehumidifiers where needed, and clean with mold-resistant solutions. Check for leaks, repair them promptly, and remove any mold growth immediately.
  6. How do I ensure sweet home sanitation with pets around?

    Groom pets regularly to minimize shedding and dander. Vacuum carpets and upholstery frequently, wash pet bedding, and keep feeding areas clean. These practices help reduce allergens and maintain a sanitary environment.
  7. How can I minimize dust buildup in living areas?

    Dust surfaces weekly using microfiber cloths, and vacuum regularly. Launder curtains and upholstery, and consider investing in an air purifier to capture airborne particles. Keeping windows closed during high pollen seasons can also help minimize dust.

Conclusion


Sweet home sanitation is within reach when you incorporate these strategies into your cleaning routine. Your home will not only be sparkling clean but also a healthier and more comfortable environment. Stay consistent, and enjoy the benefits of a well-maintained, inviting living space. For more expert cleaning tips, visit Clean Sculpt and discover how our comprehensive guides can help keep your home in top shape.


Choosing Best Floor Mat Cleaner

affective Floor Mat Cleaner

Choosing the right floor mat cleaner is crucial for maintaining the cleanliness and longevity of your mats. Whether it’s for your home or business, understanding which products and techniques work best can ensure your mats stay pristine and hygienic.

Types of Floor Mats and Their Cleaning Needs

Floor mats come in various materials, each requiring specific care to maintain their appearance and functionality.

Rubber Mats

Rubber mats are durable and ideal for high-traffic areas. Use a cleaner that can tackle dirt without degrading the material.

Carpet Mats

Carpet mats absorb moisture and capture dirt. They need a cleaner that can penetrate fibers without leaving residue.

Polypropylene Mats

These mats are stain-resistant and perfect for outdoor use. They require a cleaner that can remove tough grime without fading the material.

Choosing the Right Floor Mat Cleaner

Type of Dirt and Stains

Consider the common types of dirt and stains your mats are exposed to. For entry mats that might collect mud, sand, and water, you need a robust cleaner that can tackle heavy soil. For mats in areas like kitchens or industrial settings, a cleaner capable of cutting through oils and greasy residues will be more appropriate.

Eco-Friendly Options

If environmental impact is a concern for you, look for eco-friendly floor mat cleaners. These products typically avoid harsh chemicals like phosphates, chlorine, and ammonia, which can be harmful to both the environment and human health. Instead, they use natural enzymes or plant-based ingredients that are biodegradable and safer for use around pets and children.

pH Balance

The pH level of a cleaner affects its ability to clean certain types of soils and its safety on certain materials. Neutral pH cleaners are safe for most materials and are effective for light to moderate soil. Acidic cleaners may be needed for mineral deposits and rust, whereas alkaline cleaners are better for oils, fats, and proteins.

Concentration and Cost-Effectiveness

Some floor mat cleaners come concentrated and require dilution before use, which can be more cost-effective over time, especially for high-traffic areas that necessitate frequent cleaning. Calculate the cost per usable gallon to compare the real value of cleaners.

User Reviews and Recommendations

Before making a final decision, check online reviews and testimonials from other users who have similar needs. This can provide insight into how effective a cleaner is in real-world conditions and any issues users might have encountered.


Table: Comparison of Popular Floor Mat Cleaners

Brand

Type

Suitable for

CleanMax Pro

Liquid

All Mat Types

EcoPure Shine

Spray

Indoor Mats

Grime Buster

Foam

Rubber and Vinyl

Nature’s Clean

Concentrate

Carpet Mats

How to Use Floor Mat Cleaners Effectively

Follow these steps to ensure effective cleaning:

  1. Remove loose dirt by shaking or vacuuming the mat.
  2. Apply the floor mat cleaner according to the instructions.
  3. Scrub if necessary, depending on the mat type.
  4. Rinse thoroughly to remove any soap residue.
  5. Allow the mat to air dry completely to prevent mildew.

Choosing the right floor mat cleaner

Maintenance Tips to Extend the Life of Your Floor Mats

Regular cleaning with a good floor mat cleaner is essential, but maintenance doesn’t stop there. Here’s how you can keep your mats in top condition:

  • Rotate mats to ensure even wear.
  • Treat stains immediately to prevent permanent damage.
  • Store mats properly if not in use for extended periods.

Promoting a Cleaner Environment with Your Floor Mat

By keeping your floor mats clean, you contribute to a healthier environment by reducing the spread of dirt and allergens.


FAQs About Floor Mat Cleaners

  1. What makes a floor mat cleaner eco-friendly?

Eco-friendly cleaners typically contain natural ingredients that are less harmful to the environment. They avoid harsh chemicals, promoting healthier living spaces.

  1. Can I use the same cleaner for all types of floor mats?

 While some cleaners are versatile, it’s best to use products designed for the specific material of your mat to avoid damage.

  1. How often should I clean my floor mats?

The cleaning frequency depends on the usage and location of the mat. High-traffic areas might need weekly cleaning, while others may be less frequent.

  1. Are there any homemade floor mat cleaner solutions?

Yes, a simple mixture of vinegar and water can be effective for many types of mats. Add essential oils for a pleasant fragrance and additional cleaning power.

  1. What should I avoid when cleaning floor mats?

Avoid using too much water on mats that are susceptible to water damage, and steer clear of harsh chemicals that can degrade the mat fibers.

  1. How can I remove tough stains from my floor mats?

Pre-treat stains with a mixture of baking soda and water before applying your regular floor mat cleaner to enhance stain removal.

  1. What is the best way to dry floor mats after washing?

Air drying is ideal. Hang the mats in a well-ventilated area or outside to ensure they dry completely and prevent mildew growth.

Conclusion

Right floor mat cleaner and following best practices can dramatically extend the life of your floor mats. For more cleaning insights and guides, visit our blog at Clean Sculpt, where we sculpt your understanding of clean!


DIY carpet cleaning at home

Carpet Cleaning Techniques

Carpet cleaning is essential for maintaining a fresh and healthy home environment. Regular vacuuming and spot cleaning are good practices, but deep cleaning your carpets can extend their life and enhance your living space. In this guide, we’ll explore various methods and provide practical advice to keep your carpets looking their best.

Know Your Carpet: Materials and Maintenance

Different carpet materials require specific care strategies. Whether you have wool, synthetic fibers, or a blend, understanding the nature of your carpet can help you choose the most effective cleaning techniques.

  • Table: Carpet Types and Recommended Cleaning Methods

Carpet Type

Maintenance Frequency

Cleaning Method

Wool

Bi-annually

Steam cleaning

Synthetic

Quarterly

Dry cleaning

Blends

Every six months

Shampooing

Regular Maintenance: Vacuuming and Spot Cleaning

Vacuuming regularly is the first line of defense against dirt and debris. For spills, immediate action is crucial to prevent stains. Use a cleaning solution that is suitable for your carpet type to dab and gently remove spills.

Choosing the Right Deep Cleaning Method

When it’s time for a deep clean, there are several methods to consider:

  • Steam Cleaning (Hot Water Extraction):
    Steam cleaning, also known as hot water extraction, is one of the most commonly recommended methods for deep cleaning carpets. This method involves injecting hot water and cleaning agents deep into the carpet fibers, then extracting them along with the dislodged dirt and grime. It’s particularly effective for removing deep-seated dirt, dust mites, and other allergens that can accumulate over time. Steam cleaning not only cleans the surface but also rejuvenates your carpet’s fibers, making it ideal for most types of carpets, especially those in high-traffic areas.
  • Dry Cleaning (Compound Cleaning):
    This method is often chosen for its quick drying time and minimal use of water. Dry cleaning involves the application of a special cleaning powder or compound that is worked into the carpet using a motorized brush. The particles of the compound absorb dirt from the carpet fibers, and after a short dwell time, the powder and the dirt are vacuumed away. Dry cleaning is particularly suitable for delicate carpets or those that can be damaged by water, as it does not significantly moisten the carpet. It’s also a great option when you need a quick clean and cannot wait for the carpet to dry.
  • Shampooing
    : Carpet shampooing is a traditional method that uses a foamy chemical that is applied to the carpet and worked in with a brush. Motorized, rotating brushes scrub the shampoo into the carpet to loosen dirt, debris, and stains. After the shampoo has dried, it is vacuumed up, bringing the dislodged dirt with it. Shampooing can be very effective for heavily soiled carpets, but it requires careful handling to avoid leaving residues that can attract more dirt over time. Additionally, carpets cleaned by shampooing may take longer to dry compared to other methods.


DIY vs. Professional Carpet Cleaning

While DIY methods can be cost-effective, professional carpet cleaners have the tools and expertise to handle challenging issues like deep stains and odor removal.

Best Practices for Carpet Longevity

To prevent premature wear and tear:

  • Place mats at entrances to reduce incoming dirt.
  • Rotate furniture periodically to distribute wear evenly.
  • Address spills immediately to avoid permanent stains.

FAQs on Carpet Cleaning

Q1: How often should I clean my carpets?
A: Ideally, carpets should be vacuumed weekly and deep cleaned every 6 to 12 months. The frequency can vary based on foot traffic and specific needs of your home.
Q2: What’s the best way to remove a carpet stain?
A: Quickly blot spills with a clean cloth, avoiding rubbing. Use a carpet cleaner suitable for your carpet type. For persistent stains, consider a professional cleaning service.
Q3: Can I use baking soda on my carpets?
A: Yes, baking soda is great for removing odors. Sprinkle it lightly on your carpet, let it sit for 15-20 minutes, and vacuum it up thoroughly.
Q4: Is steam cleaning safe for all carpets?
A: Steam cleaning is safe for most carpets but check the manufacturer’s guidelines. Wool carpets, for example, may require a different approach.
Q5: How do I choose a carpet cleaning service?
A: Look for licensed professionals with positive reviews and fair pricing. Ensure they use methods compatible with your carpet type.
Q6: How can I maintain my carpet after a deep clean?
A: Avoid walking on the carpet until it’s completely dry. Use doormats to minimize dirt and rotate your furniture to even out wear.
Q7: Are there eco-friendly carpet cleaning options?
A: Yes, many companies offer green cleaning solutions that are effective and safer for the environment. Ask about eco-friendly options when booking a service.

Conclusion

Keeping your carpets clean not only enhances the beauty of your home but also contributes to a healthier environment. By understanding your carpet’s needs and choosing the right cleaning methods, you can ensure its longevity and pristine condition.

Discover more expert cleaning tips and guides at Clean Sculpt, your premier resource for all things clean. Join us as we explore the best ways to keep your home spotless and inviting.